
Since photography first started developing as an artistic medium, we have been enthralled by the power of black and white images. They have an undeniable beauty and grace that transcends reality to give us something more profound. Every photographer, at some point or other, wants to play with this incredible style.
But how do you go about getting it right? There is certainly a line between taking any old black and white photograph, and creating one that really stuns. Here are some tips to help you create a photograph that will shine in monochrome.
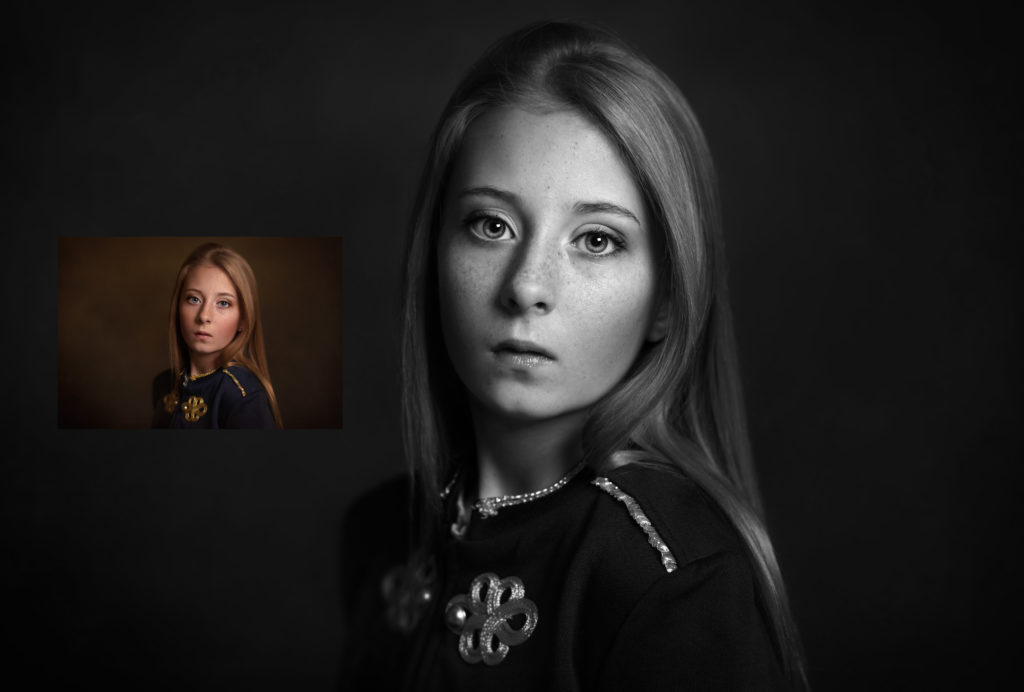
Image is courtesy of Shannon Squires Photography – Edited using “Modest Silver” a black and white Photoshop action from the Everyday Workflow Essentials – Photoshop Action Collection
Never shoot in black and white unless you’re shooting in RAW format
It might seem odd that our first tip is to avoid doing something, but this is for good reason! When you use your camera’s black and white mode to shoot, you are actually removing a lot of the potential from the image. Your camera has the ability to capture a full range of tones across the spectrum, and can recreate something close to real life. If you limit it just to shades of black, white, and grey, then you are removing a huge amount of functionality from the device.
Your DSLR was designed for colour, so that’s how it works best. Simply put, you will take a better photo in color. But if that isn’t enough of a reason for you, we next need to look at the process of post-production. When you edit an image and convert it into a black and white file, you have several options for tweaking and adjusting that image. You can make the darkest areas darker, or the lightest areas lighter, or vice versa. You can also adjust the way that the black and white image is created. You do this by choosing which of the color tones in the image read as the darkest or lightest.
If your photograph doesn’t have color tones recorded in it in the first place, you remove a lot of the editing options that are available to you. Also, because shooting in-camera does not give you the contrast or balance that the image needs, you will still need to edit it anyway. Shooting in black and white does not save you time, and might limit the possibilities for your final image. Really, it’s a no-brainer: stay away from in-camera black and white!
Choose your tools
Next, you can decide how to convert your image to black and white in Photoshop. There are a number of options available to you, as we will explore here.
The hue and saturation tool is very easy to use if you don’t want a very contrasty look. All you have to do here is open up the tool and slide the “saturation” bar all the way down to the bottom. Just like that, your image is black and white. This is a good tool to use because it is non-destructive: the changes happen on a new layer rather than affecting the original file. This means that if you make a mistake, you can go back and tweak it or delete it. However, it does not allow you to control the tones of the image very well. You can change the darkness and lightness of each individual color, but this can be clumsy, causing parts of the image to pixelate or look obviously retouched.
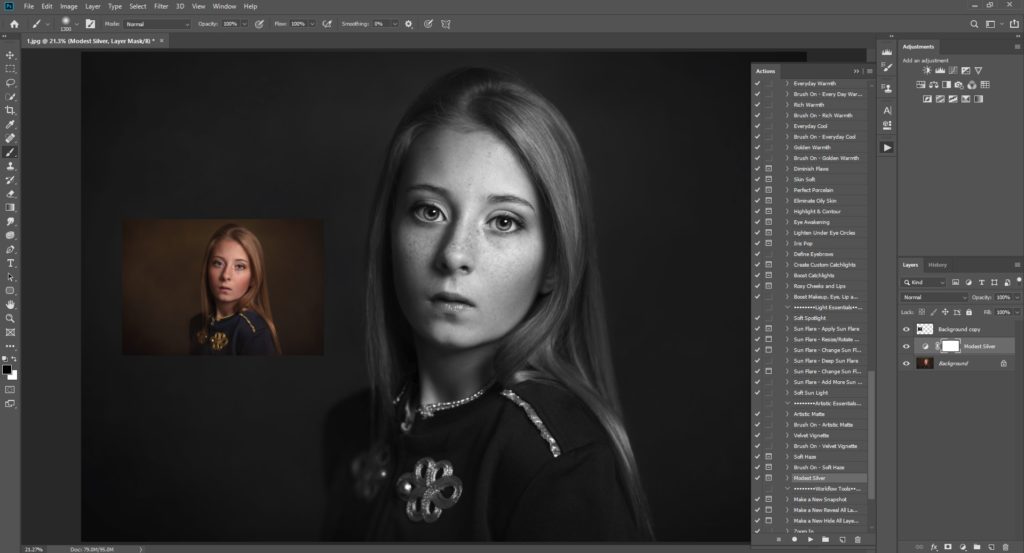
Photoshop actions are a great way to create black and white images quickly, as they can be batched to edit multiple photos at once. There is a black and white Photoshop action called “Modest Silver” created by Summerana in the Everyday Workflow Essentials Photoshop action Collection that is perfect for this.
Photoshop also has a black and white tool, which is used specifically for black and white conversion. Here, just click on the tool and it will again open up on a new layer. There is more control with this tool, as you can adjust each slider to change the lightness of the particular colors. These changes may not be enough to generate the contrast you are after without making the image look odd, so it’s always a good idea to use the curves tool as well.
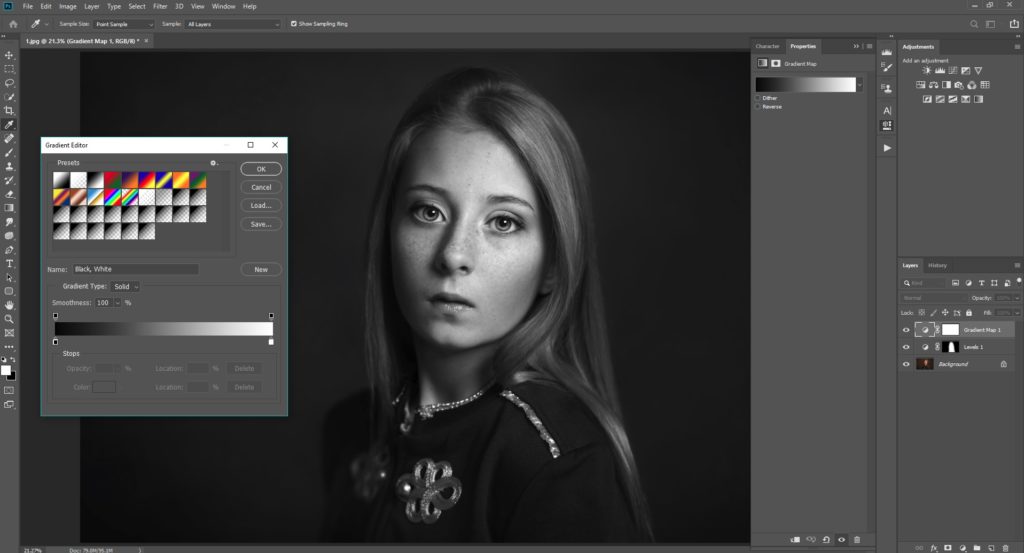
Finally, you can also use the gradient map which is my favorite. This layers a contrasty gradient over your image and there is black and white gradient built right in to Photoshop. You can adjust the sliders in the gradient editor to add more contrast/light.
You can play around with the different options, and also mix and match for different looks. Adding dodging and burning is a great addition to add on top of your new black and white image for an even more eye popping image. The possibilities are endless!
Choosing your photograph
All of this editing will be for nothing if you don’t have a good photograph to start with. Not every shot will look good in black and white. For example, some images require color for explanation. Imagine a photograph of a sports fan wearing his country’s flag on his back and a shirt in his team’s colors. The significance of his clothing would be lost completely in black and white. You’ll want your image to be able to tell a strong story without a need for color to give it it’s context clues.
What works well in monochrome? Portraits are a very strong example. A tight-cropped headshot with very sharp focus on the eyes, and softer focus elsewhere, will always look absolutely stunning in black and white. Silhouettes can look great in monochrome as well, and if you are trying to make an artistic or cultural point, then black and white can lend the gravitas needed. It can also be a good choice for a few select wedding photographs, though generally you should leave most of the set in full color.
Here is a video Grace Pamela made to show you how you can create the best dramatic photos in Photoshop:
The more you play around with black and white, the more you will know what kind of images work – so get practicing!
Do you have any tips for using black and white? What do you wish you had known when you first started converting your images? Share with us and other readers in the comments below!
“Never shoot in black and white.” Sorry, but I think further clarification is necessary. Never shoot in B/W in JPG mode for reasons stated above. But shooting in B/W with RAW mode does not lose any information at all, and the B/W allows you to visualize the patterns of gradation better than just looking at the color. So, go ahead and shoot in B/W mode as long as you’re shooting your images in RAW.
Thank you for the clarification Michael!
Thank you for the tutorial. I really ejoyed it and learned a lot.
You are most welcome Stefany, I’m so glad it was helpful!
Awesome blogpost! Thank you Pamela. I loved the video. That dramatic b&w conversion looks amazing…
Thank you, I’m so glad to hear you love it!
Great tutorial. Thanks for the information.