
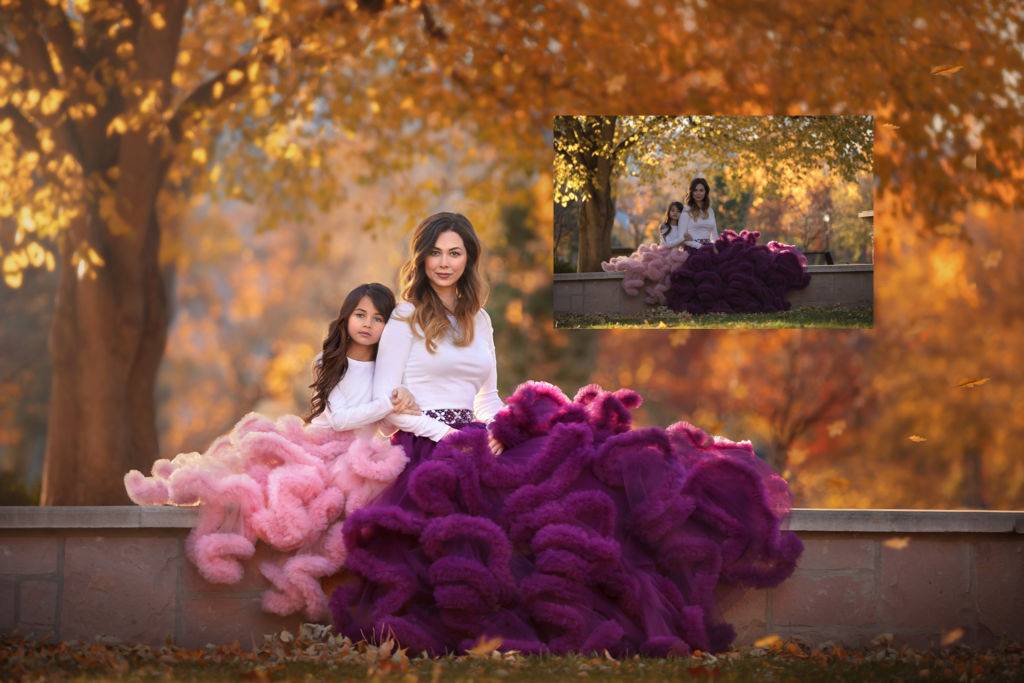
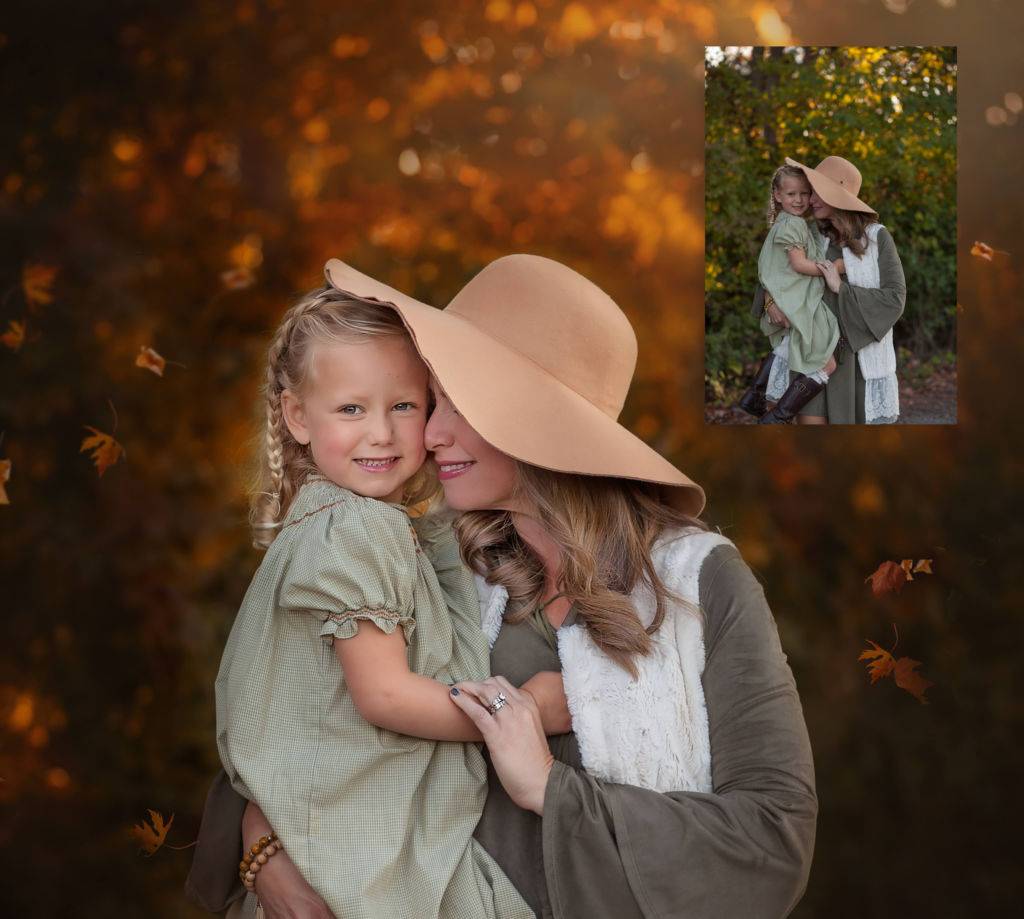
Beautiful fall images, with orange and red leaves falling around your subjects, are always a highlight of the year. The season brings a crisp light as well as wonderful backdrops, and always looks so good on camera.
But that might not be something that you get to experience in your part of the world. Fall may be something that simply happens to other people! If this is the case, you won’t be able to shoot fall photos – unless you recreate the look in Photoshop.
It may also be that you simply shot something out of season, and now want to adjust and update the editing to bring it into a fall style.
Either way, it’s easy to create a whimsical fall look in Photoshop. All you need are two of the Summerana Photoshop collections – the ColorFall Action Collection and the Leaf Overlays. You can find these in the Summerana Store or our membership library
Stick around for the end to find out how you can get some FREE leaf overlays!
Creating a fall look
The first thing to do when creating a fall look is to make sure you have the right image to start with. You won’t get the best results if you try to add fall elements to a snow scene or a shoot at the beach, for example! Areas with trees are often the best setting for fall looks – even if they are bright green and showered in sunlight, you can give them a fall tone easily.
You can also start out by cleaning up your RAW file and making sure that it is ready to start editing. Don’t worry if you don’t know where to start. There is actually a cleaning action included with the ColorFall collection, so you can get that done right away.
The biggest and most important part of creating that whimsical fall image is the colors. Everyone knows that the leaves turn orange and brown in the fall, before they start to fall off the trees. There is also a different quality to the light during the fall, as the days get shorter and the weather changes. This means that even grass, which doesn’t change color year-round, will look a little different. The sky, too, might have a different cast.
It’s all about how we perceive light, and when we have experienced fall ourselves, we just know what it looks like. That’s why you won’t fool anyone if you don’t get the colors right!
Color-toning your image can take a lot of time and effort, especially when it comes to picking out the colors that have that real fall magic to them. The ColorFall action collection comes with a choice of different fall color tones, so you don’t have to worry about tracking them down. Just pick the one that works best with your image and press play – the action will do all of the work for you.
Making it real
The next step is all about making it look more realistic. When you take a look at your image after using the fall edits, you might feel like it doesn’t quite look right yet. There are lots of solution for this, as you can see demonstrated in the tutorial video for the ColorFall action collection.
You may need to use a brush at a lower opacity to remove some of the color toning, such as to bring a little more green back through on the ground. Or you may wish to reduce the opacity of the layer as a whole and set your shoot in early fall.
When you are happy with the effect of this edit, there’s more to play around with if you wish. The final image editor actions are set up to do those final touches, such as removing color casts, getting rid of dull areas, and adding more depth. You can also use some extra color casts to create a gorgeous look, as well as adding a vignette if you want to.
Since the sun sits lower in the fall, you can also add some light flares, which add real oomph to the image and can make it more realistic for your viewers.
Adding falling leaves
Next up, you can have a lot of fun adding some leaves to your image! During the fall, a stiff breeze can easily knock down leaves from trees and allow them to swirl in the air before they drop. This has a really romantic effect, although it’s almost impossible to capture that perfect look in camera.
There’s a solution to this which doesn’t involve you throwing leaves at your clients for hours. Yes, you can get your assistant to put the leaf blower down! Simply take your photograph as normal, or use an image you edited with the ColorFall Photoshop actions, and add some leaf overlays.
These overlays are really easy to apply with the Summerana action collection dedicated to getting them looking perfect. First, you drop in your leaves, choosing an overlay which has as many or as few floating leaves as you prefer.
Get the overlay placed over the top of your image, and you can apply a range of edits to them. You can even take some leaves out if they are over your subject’s face or if you don’t want them across the whole image.
The leaves are even blurred or left sharp in different areas of the overlay to add depth to your image, making it look as though they really are there in the scene. Match them up to the tones of your trees created with the ColorFall actions and you will have a perfectly believable, but utterly whimsical, fall scene.
Even if you never see real fall weather again for the rest of your life, you can provide it in post-production for your clients any time they want. This is a great way to add a new service to your portfolio and really enchant your clients with magical portraits!

Images courtesy of: Tracy Joy, Stephanie Ratto, & Shannon Squires.
Are you ready to create some fall magic? Go ahead and grab your free Leaf Overlays here!