
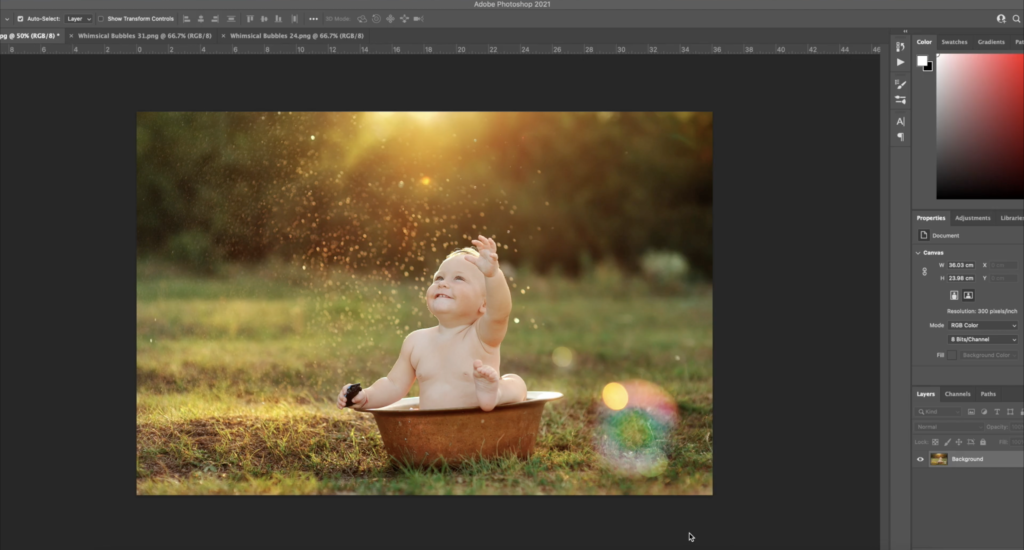
Playful photographs can be a lot of fun to create, with big smiles all around. Especially when working with children, however, it’s hard to get it all right in camera. You may need a little bit of help to get all of the elements in place – and to add some fantastical features that you could not possibly have had on the day.
Whenever you are shooting an image that could include water, or the themes of a playful summer’s day, bubbles are a great potential addition to the scene. This is how to get bubbles into your image even if you didn’t have them blowing around on the day.
Adding a bubble overlay
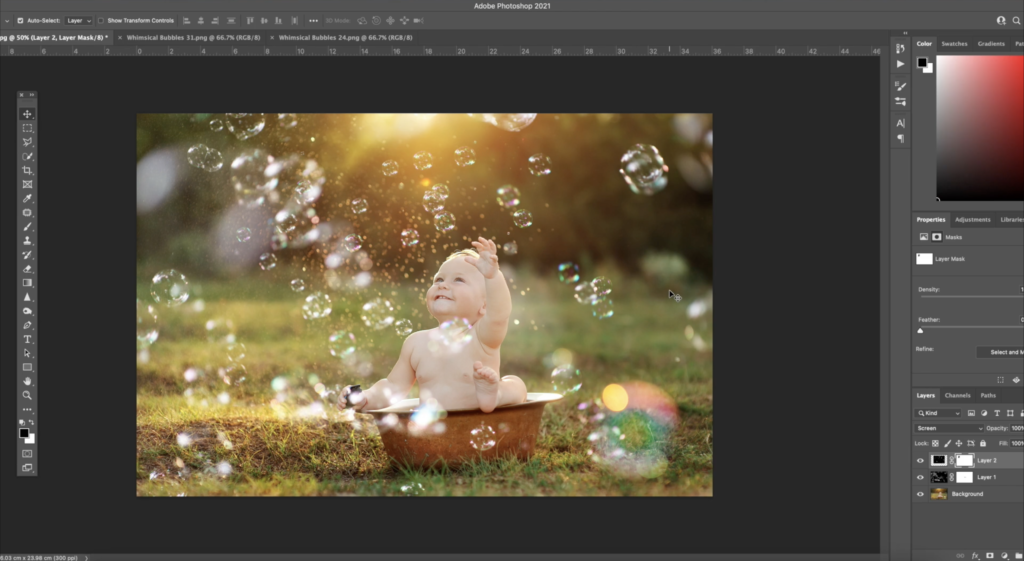
To get started, you first need to add a bubble overlay. This is an image of bubbles on a clear background which can be put over the top of your existing image. Overlays are hugely useful for adding in elements that don’t really exist in your image, because you can literally lay them over the top of your photograph, as the name suggests.
To get some great bubble overlays into your Photoshop tool deck, you can download the Summerana Whimsical Bubbles Overlay and Photoshop Action Collection. This will take out all of the hard work so that you can drop the bubbles in and edit them easily! Once you have the action collection installed, the next part is simple.
Open the action panel and choose ‘Apply Bubble Overlay’. When you press play and start it up, you will be taken to a dialogue box asking you to choose your overlay. Make sure that you navigate to your Summerana overlay folder to find them – you should save them somewhere easy to find like your desktop or a dedicated overlays folder so that you don’t lose them.
When you find the folder, decide on which of the overlays you want to use. There are lots to choose from, so if you don’t know where to start, go for number one! You can easily remove your overlays again if you change your mind, so feel free to experiment and try all of them if you want. You can also go into the folder outside of Photoshop in order to view the individual images in your image viewer to help you make a decision.
Once you have added the overlay, you can stretch it out to cover the whole of your image while holding down the shift key, and then press enter or click the tick in the top panel in order to continue. Don’t worry that the overlay looks black at first – it will soon clear up once it has been placed!
Editing your bubbles
Now that you have your bubbles in place, it’s important to edit them and adjust them to where you want them.
To remove bubbles, which might be over key elements such as your subject’s face, use a soft black brush on the layer mask and they will disappear. If you make a mistake, just switch back to a white brush and paint them back in. This will allow you to take out bubbles you don’t like and adjust the amount of visible bubbles to your preferences.
If you want to copy a bubble to a different place in the image, you can use the clone tool. Make sure that you have the layer itself selected, make your clone brush large enough to cover the whole bubble, and click on it with the ALT key held down. Now, when you use the same brush to paint on another part of your image, you will be able to paint that bubble on in a new area.
You can also then use the black paintbrush to remove the original bubble, if you wish to keep every single one as unique as possible.
The other tools in the Photoshop action panel from this collection will help you to adjust the bubbles in other ways. You can resize or rotate the bubbles to create a new look, or you can even put down a new overlay on top of the current image in order to combine two different overlays.
You can also change the colour of your bubbles – adding some in, or taking it away so that they appear clear.
Making it real
You can brighten or darken your bubbles, as well as darkening your background to make the bubbles stand out more. This really helps to bring atmosphere to your images and create bubbles that look as though they really were there on the day.
Another way to edit your bubbles is to try blurring some out. When your portrait has a low depth of field, the background should be blurred out; adding in bubbles which remain clear and sharp despite their apparent depth in the image will be confusing to the viewer. To avoid this, you can blur out some of your bubbles and keep others crisp to mimic your original focal points.
Don’t forget that you can also change the opacity of your bubble layers. This will help to add depth and make it appear as though some bubbles are in the distance or are more ethereal, while others are more bold and distinct.
You will want to edit your Photoshop bubble overlays in different ways depending on the image you are placing them on. The great thing about all of these extra tools is that you can use them to make even one overlay look very different for each image. Since you have so many to choose from, each portrait will be different from the last!
There are lots of ways to use your Summerana Whimsical Bubbles overlay collection, helping to improve your portraits and even selling particular sessions on the idea of adding bubbles later. They are particularly fantastic for babies and young children, who will appear to be playing with the bubbles and laughing.
If you want more help on using bubble overlays, watch this video from Monika Cioban which demonstrates exactly what you can do with them! You can find it in the Summerana library, here!
Not yet a member? Find out more about the Summerana Academy, here!
It would help if you created a lot more tutorials like this. Please create talking films as you make your picture manipulation masterpieces since your gallery is fantastic!
Thank you for your feedback! We will get to work on creating more written tutorials like this, but video tutorials are always available inside the Summerana Academy. Please let me know if you have any questions.
I think after photography for marketing photo editing is also important.
One unforeseen benefit of this post is that it presents a simple technique for extracting metadata from an image. When exchanging pictures that contain sensitive information, this is a must. It’s on my to-do list to create an informational standardized XMP file and download the necessary steps.
Generating additional tutorials like this would be beneficial. Consider creating narrated videos while crafting your picture manipulation masterpieces, especially given the excellence of your gallery!