Including animals in your photographs can really add something special! However, it can be dangerous and difficult to work with live animals, and near impossible to find exotic animals to include in your photoshoots. Can you imagine trying to get a real bunny or elephant to maintain the correct pose for your desired composition? Yikes! These challenges are easily overcome by using animal overlays instead. Here’s a quick guide on how to create whimsical images using animal overlays!
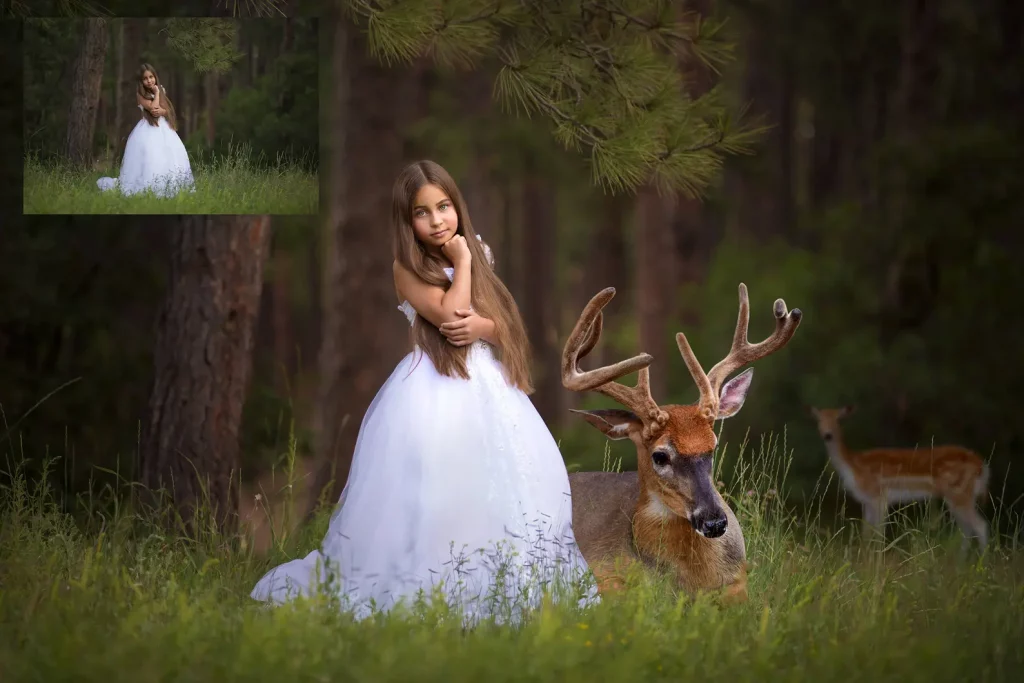
Image Courtesy of Shannon Squires Photography
Select Your Overlays
Whether you planned an entire photoshoot with an animal overlay in mind, or already have an image that could benefit from the added magic of one, Summerana’s got you covered! Summerana offers both Photoshop actions for blending, and a wide range of animal overlays including zebras, lions, deer, ducklings, penguins, giraffes, bunnies, butterflies, reindeer, and much more. Some of these overlays are available for individual purchase in our Etsy shop and Summerana Store, or get access to all of them by joining the Summerana Academy. Once you’ve selected your desired animal overlay, you are ready to set up an amazing scene!
Now it’s time to install the accompanying Photoshop actions created to make blending everything together more seamless and efficient. While Summerana Academy members have access to an installation guide, anyone can view our YouTube tutorial to learn how to add actions into Photoshop. Since overlays are really just images, they can’t be uploaded or stored in Photoshop like actions can, so be sure to save them somewhere you can easily find them. This will make it a lot easier to navigate to the correct folder when it comes times to add your overlay to your image in Photoshop.
Adding Your Overlay
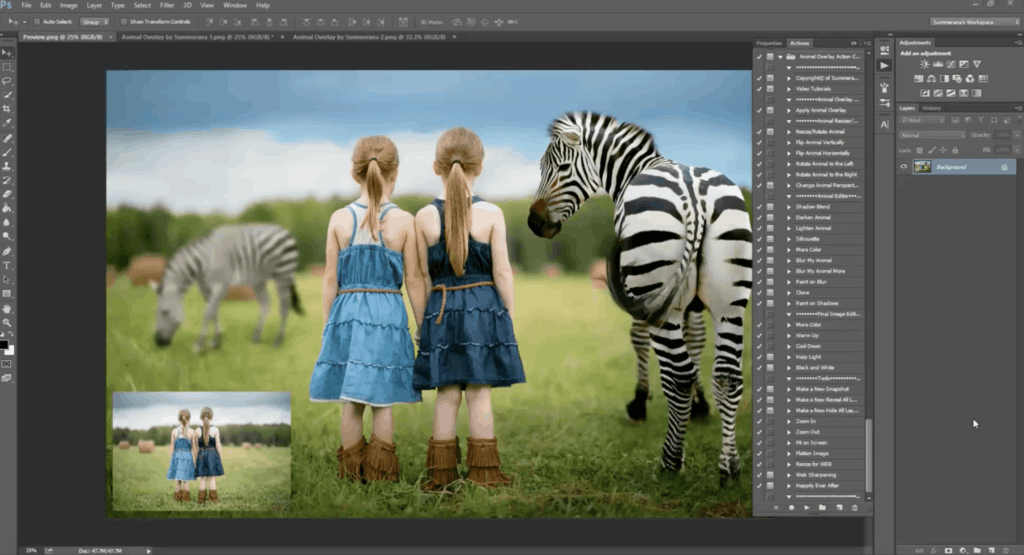
Once you find that special image that could use the whimsy of an animal overlay, open it up in Photoshop. Now you’ll open the actions panel, select ‘Apply Animal Overlay’, and click play. You will see a dialogue box pop up, just press continue and select an animal overlay. You could even experiment and choose more than one to see what best fits your vision.
To change the size of your overlay, just hold down the shift key to keep margins while dragging a corner of the image. You can use your mouse to drag the overlay around until you’re happy with the composition, then press enter to confirm your selection. There’s no need to panic if you change your mind about overlay placement, you can use the actions to easily edit it later!
Image Courtesy of Shannon Squires Photography
Editing Your Overlay
If only it were as easy as dropping in an overlay to an existing image and calling it good, right!? Unfortunately, doing so could look very unrealistic. That’s where editing and Summerana actions come into play! Using these tools can really speed up your workflow and make your images pop!
Some simpler actions make it easy to change size and perspective of your overlay, while more advanced actions help to achieve superior blending techniques. To ensure your overlay blends seamlessly, try adding a drop shadow and altering the tone of the overlay so that it closely resembles the lighting of the original photograph. Use the blur or paint blur actions to nail the correct depth of field. Want to add more oomph? Try the more colour option!
There are tons of other editing tools in the actions panel for you to try out! Don’t be afraid to add more than one overlay to your image, or to continue editing until they look like a real part of the environment that you photographed. Alternatively, there is also an action to turn your animal overlay into a silhouette, which would be such a fun challenge!
Don’t miss the finishing tools at the bottom of your Photoshop actions panel; These will help you to get the whole image ready to share, and are great for adding that last needed touch.
How to Practice With Overlays
You might not have any images that an animal overlay could be easily added to, which is totally fine! After all, it’s a lot easier to make a plan of attack once you know that you need blank space for a zebra, or for your model to pretend to look down at a bunny.
It’s totally fine to practice on any image you’ve previously taken, even if an animal overlay wouldn’t necessarily make sense for the composition. You do not need a perfect image to practice using the actions and getting your animal overlays looking more realistic. This trial and error period will help develop your editing skills, regardless of any of these practice images being released for public view.
Incorporate Overlays into Your Photography Business
There are lots of ways that animal overlays can add a bit of fun to your photoshoots. Have your clients dress up as Disney characters to pose with lions and zebras, or get them splashing around next to ducklings. Even skeptics are sure to be impressed by engagement photos featuring a giraffe as a guest! Try offering these animal shoots as one of your extra packages at your portrait sessions, and you may be surprised by how many new clients will sign up.
Now that you’ve read all about how to add your overlay, you might want to see a video of how it is done. This is great for those of you that are visual learners! Grace Pamela has put together a tutorial for Summerana Academy members that takes you through the whole process of successfully adding an overlay!