
THIS IS A GUEST POST COURTESY OF MELISSA COLLINS OF MJCOLLINS PHOTOGRAPHY
What aperture should I use for family sessions? This is a little bit of a loaded question, because everyone has a different style in how they photograph and the locations that are chosen. Some photographers like to tell a story within their images and others are more portrait oriented. Let’s break it down so we understand what aperture is first.
What is aperture?
Everything about photography revolves around light; the quality of it and the quantity of it. Your camera provides multiple settings to increase or decrease the amount of light coming into your camera. Aperture is one of those tools. It has two jobs really, light regulation and depth of field management.
Aperture refers to the size of the iris within the lens when the picture is taken and how much light enters the lens.
It is measured in f/stops – f/1.2 is considered wide open or larger ↔ f/32 is considered closed or smaller. Confusing, I know – you just have to think opposites. Open apertures like f3.5 and lower allows more light in and lessens the depth of field, creating bokeh. Closed apertures like f8 or higher lets in less light, increases the depth of field creating more of the image in focus. Think of it like the pupil of your eyes: closed pupils lets in less light and allows you to have pin-point focus. Wide open pupils allow more light in and causes what you see to fall out of focus in your peripheral vision.
Now that we understand aperture a bit better, how does that apply for your family photography?
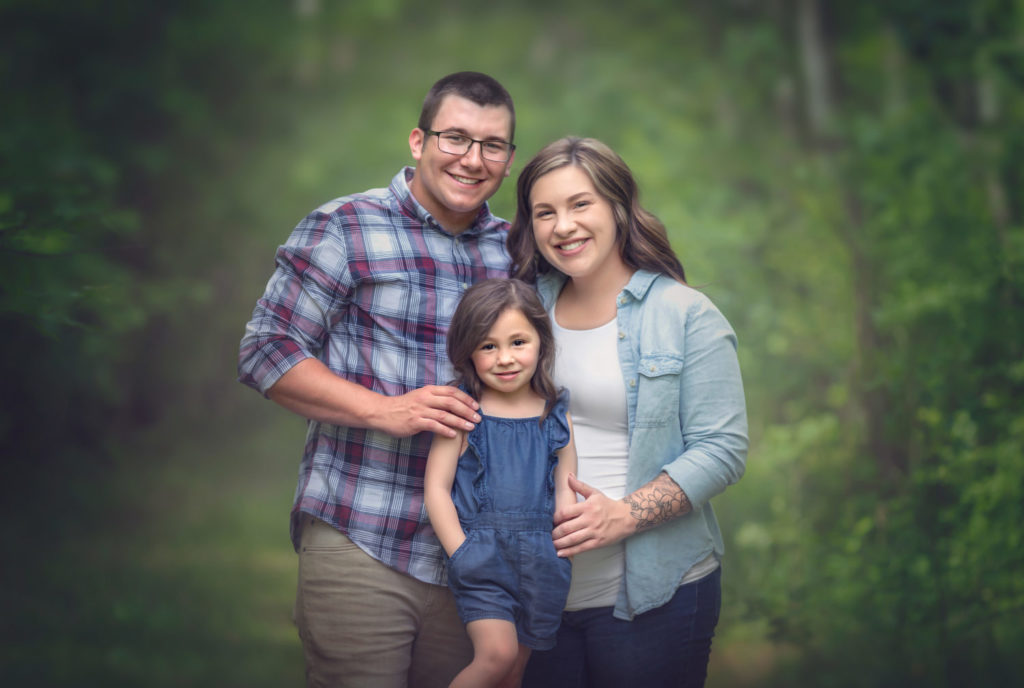
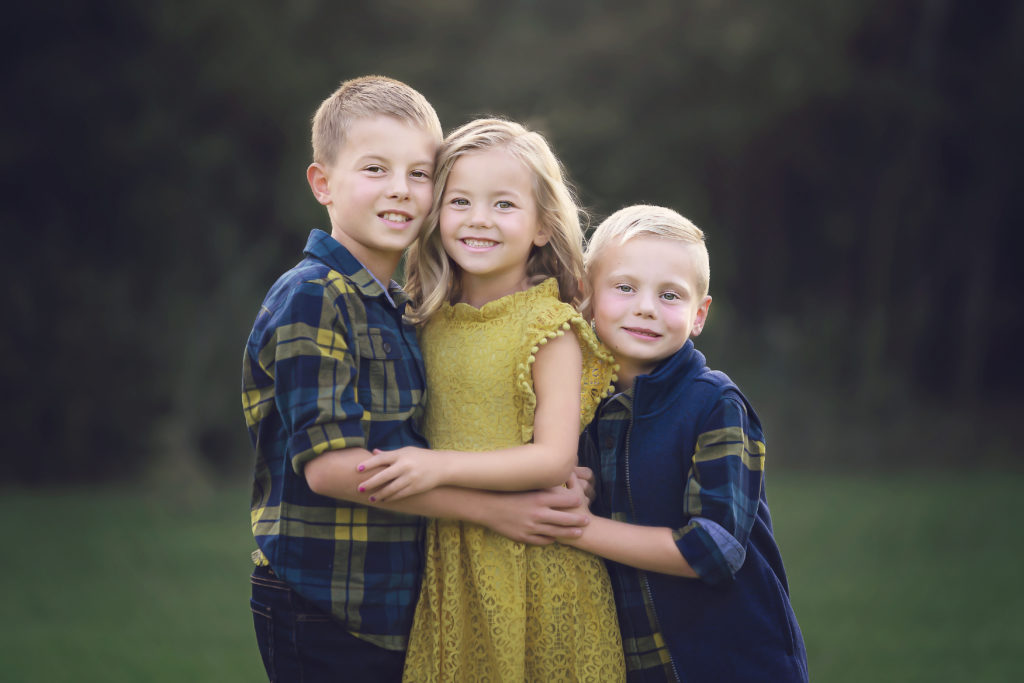
Tip 1- In family portrait photography, your main focal point is the people. Good separation from the background directs your attention to the faces. A good crop for them is the waist up…because you want to see the faces. You don’t need to see the whole scene for this. So, a good rule of thumb is to set your subjects about 4 feet from the background. So many people want to place the families right in front of a pretty flower garden, for instance. But, bringing them forward provides a soft background compression- or bokeh. This can be achieved with an entry level lens. The further the subjects are from the background, the more the focus falls off the background and keeps the focus on the people.
Tip 2 – I have heard that for the number of people in the group, that should be your aperture setting – so 4 people = f/4. But I like to break the rules. From a nerdy math point of view (and with the help of depth of field calculators), I know that with a 50mm lens, aperture f/3.2 and my subjects about 10 feet from me, they will have a focal plane of about 2 feet. That is actually quite wide, so if posed correctly and their eyes and noses are close together inside that 2 feet range, you can shoot 15 people at f/3.2 – what you will get is more light, if needed and a nice shallow depth of field. This is excellent for portraying the imagery of family closeness and hugs.
Extra Tip – Remember: to shoot wide open, everyone needs to be on the same focal plane.
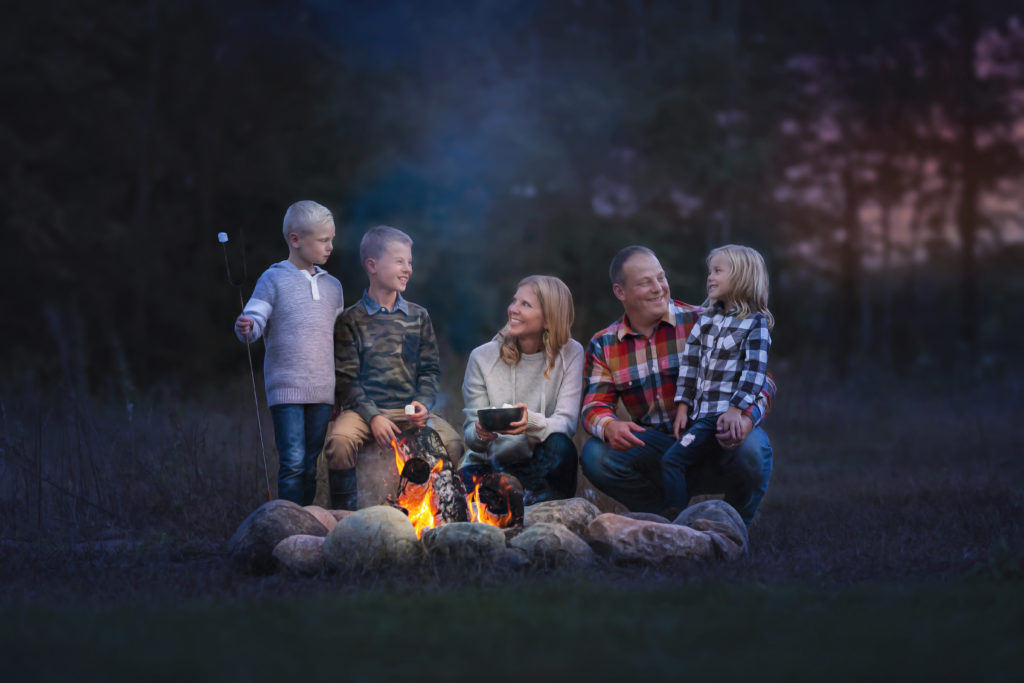
Tip 3 – If you don’t have that kind of space, or a family uncomfortable being that close, or a client wanting candid moments or even a lens that cannot shoot wider than f/4 – then you can opt for family storytelling or documentary photographing. Stepping back and closing down your aperture f/4 and smaller will bring the background and surrounding area into focus. This can be a challenge because unlike shooting wide open, unwanted content will blur easy and/or can be removed later in Photoshop, but with a wider depth of field you need to be more conscious and aware of what is visible in your frame. But this can be so fun creatively! Layering what is in the foreground, midground and background of your composition can bring your documentary photography to a new level! You can’t go wrong when you close down your aperture – you are pretty much guaranteed to have your people in focus, you can shoot full length, you can ensure the background is recognizable if that is important to your client, and you can create wonderful interactions with your family, posed or candid.
Extra Tip – Remember: Your lens has 2 jobs, besides adjusting the focal plane and depth of field, it increases and decreases light coming into your camera. Stopping down your aperture (f/4 and smaller) will let in less light, so you have to compensate for that with adjusting your shutter speed, ISO or use light modifiers.
Finally, what you really need to do is assess your situation. Are you inside? Are you outside? Is the location beautiful? Do you have a large space to shoot in? How big is your group size? What is the style of the photography? Answering these questions will help you determine where you should set your aperture, where you should place your family subjects and how to compose your scene. Everyone photographs their families differently and for different reasons, but having a clear understanding and practice time logged, you will achieve the results you want.
Extra Tip – Remember, your aperture settings will regulate your light and also manage your depth of field. It is a fun and creative challenge to practice! If you are new to manual mode, don’t get discouraged. Most cameras have an aperture priority mode, so YOU tell the camera what aperture you want, and it sets your shutter speed appropriately.
I hope you are a shooting star ★ at your next session!
Thanks for the great article