When you first start to use a DSLR, it’s very likely that there are only a few types of images that you are familiar with. Most common are JPEG and PNG, and you will likely have been using these in the past. When using a smartphone camera or a less professional camera, you will normally produce JPEG images. With a DSLR, however, comes another option: the RAW format.
Many people don’t understand what this format is or why it is so important to use it. In a nutshell, the RAW format records the most information possible in each image file, which gives you a lot more to work with when it comes to editing.
Here’s everything that you need to know about shooting in RAW format, and how it will help you to create photographs at a higher standard.

Why use RAW?
Now that you know how to use RAW, here’s a little information on why you might want to use it. RAW is good for…
- Poor lighting conditions – RAW format saves all the lighting information from the day of the shoot in your files
- Large photographic prints or posters with lots of visible detail – RAW files are the biggest files your camera can take
- High-quality portfolio images
- Retouching portraiture images without loss of quality or detail
- Avoiding blown-out highlights
- Correcting white balance issues
- Beginner photographers who might not get it right the first time in camera – this is good practice to see what settings you should fix in camera while not losing your photos completely. For example you might see later when editing your RAW file that you need to adjust the exposure completely to fix your image. Take note of this for the next time you shoot to pay attention to your exposure settings in camera
- Situations where you can take your time, shoot carefully, and edit to a large extent, such as a portrait for an important client
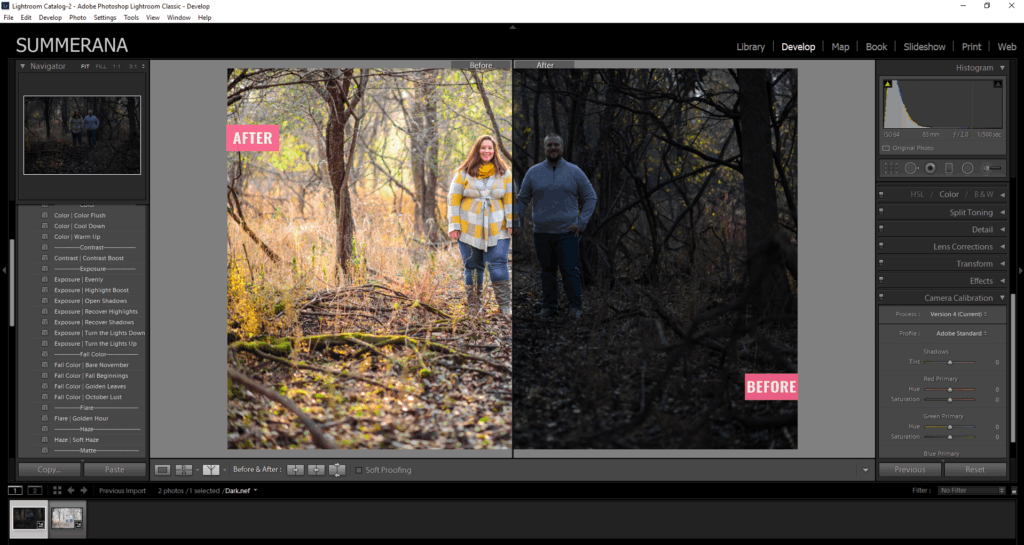
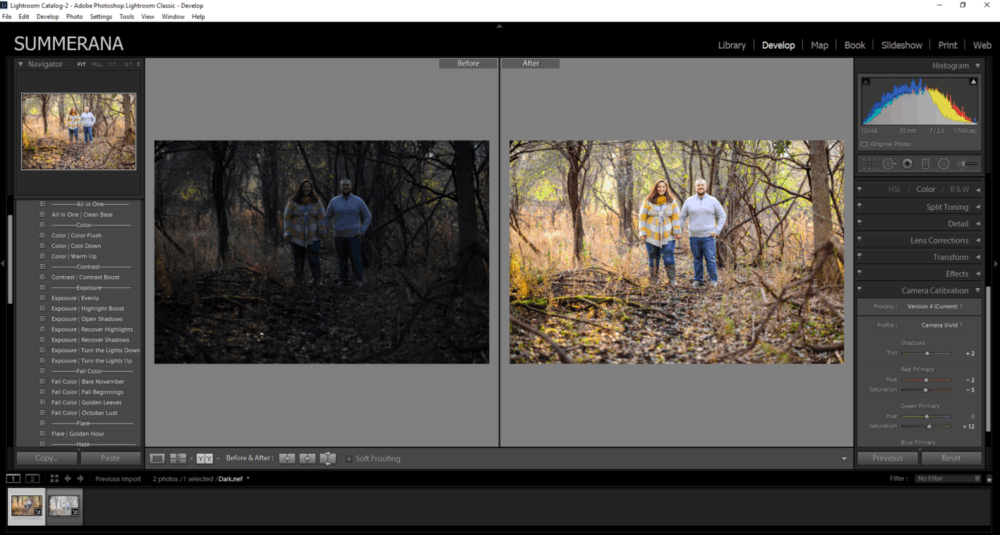
Example of underexposed image taken in camera (left) and the after (right) after editing the RAW file in Lightroom – note how the details are not lost:

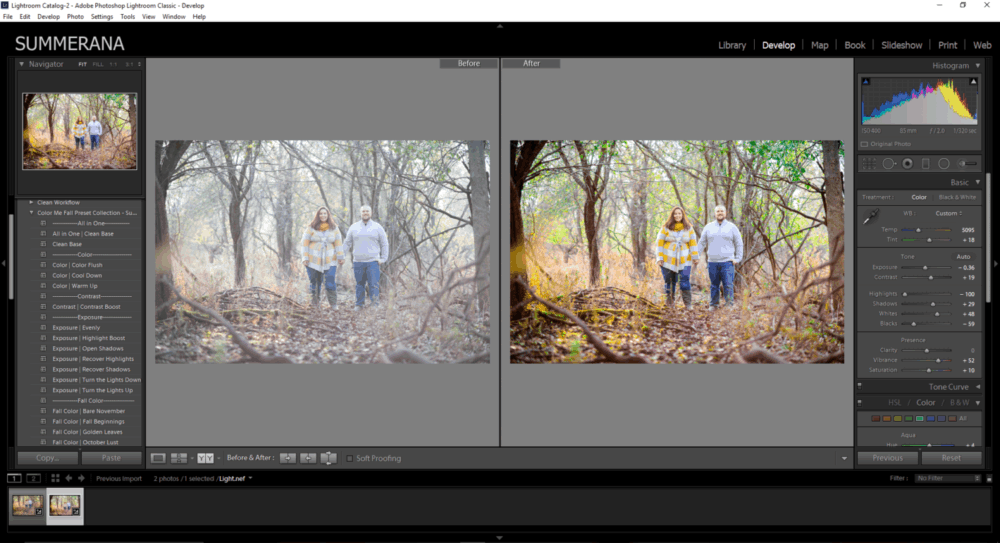
Example of overexposed image taken in camera (left) and the after (right) after basic editing the RAW file in Lightroom – note how the details are not lost:

Setting up RAW
First, let’s look at setting up your camera to shoot RAW. In your menu options, you will have the opportunity to choose from a number of types of image file. You can decide whether they are large or small, and which file format they are saved in. This all tells your camera what to do. It will be different from model to model, so make sure you read your manual for more details on how to access the menu options.
There are usually two options you can choose from which will be relevant in this case. These are to shoot just in RAW, or to shoot with RAW plus a JPG file. This means you get both the RAW version, and the JPG version, saved to your camera at the same time.
This will take up much more memory space, so why would you want to do it like this? The reason is that any files that don’t need much editing can simply be edited from the JPG file. When you need to go more in-depth, you can go to the RAW file. If you do shoot this way, make sure that you back up and save both versions when transferring them to your computer as well.
If you don’t feel that this is useful to you, just shoot in RAW. If, for example, all of your work is done in-studio or in shifting light conditions, you will probably always want to work from the RAW file to ensure that you can control your light better.
Setting up your camera to shoot RAW files in the largest possible format is only half the battle to getting everything set up. Make sure that you have a big memory card so you never run out of room, and get ready to set up your editing suite for RAW.
Uploading and Editing RAW
When you put RAW files onto your computer, what do you do with them next? You are likely to find that many of your in-built gallery programs have trouble showing RAW files because they are more out of the ordinary. But that’s fine, because you will be able to view – and convert – them in your image editing software.
Photoshop and Lightroom are both capable of processing RAW files, and doing so to a good standard. This step is the most important part of dealing with RAW files, as this is where you will unlock all of their power.
Watch Grace Pamela show you how to save a completely underexposed and overexposed (raw) image in Lightroom:
Load up a RAW file into Photoshop or Lightroom and take a look at it for a second. If you can’t find your RAW files, by the way, they will have a different file format depending on which camera manufacturer you use. They might be labelled as .NEF for Nikon, .CRW or .CR2 for Canon, .ORF for Olympus, and so on.
The RAW file will probably look a little dull and lifeless when you first load it up. Not what you were expecting, right? Well, here’s where the magic starts.
Using the tools in your image processing software, you get to decide how the final image looks. Do you need it to be brighter? Do you want to reduce the highlights? Is there a need to bring back detail in the shadows? How about boosting the colors?
You can make all of these changes, and more – and the best part is that it is all non-destructive. When you save a JPG file, you overwrite all of the previous data and the image you have now is the only version available: the older versions were destroyed. With a RAW image, all of the data is still there, and you can re-process it as much as you like.
Once you are happy with your image, save it in the file format you prefer – most photographers use JPG – and you have a file which can be viewed with any image viewer. You can also upload it to the internet easily, and it takes up less room than the RAW file, too.
Watch Grace Pamela show you how to save a completely underexposed and overexposed (raw) image in Photoshop’s Adobe Camera Raw (ACR):
Storing RAW files
You will notice that RAW files are much larger than JPGs taken right out of your camera. They can be twice or even three times the size, which makes storing them difficult.
If you are struggling with storage, the best advice is to get a large external hard drive. At least a terabyte may be required if you are serious about shooting in RAW from now on. You can then move any RAW files which you are no longer using right over to the hard drive, clearing up your computer for more files later on.
RAW isn’t for everyone, but once you know how to use it, you can make that choice as more of an informed decision. There’s only one thing left to do, and that’s to get snapping! Leave a comment to let us know about your experiences when shooting with RAW.
Pingback: How to Change your RAW Photo to the Same as the Back of your Camera with one Click of a Button in Lightroom and Photoshop - Summerana - Photoshop Actions for Photographers
Hi there! Such a good article, thank you!
Öğrenmeye devam eden herkes genç kalır. Henry Ford