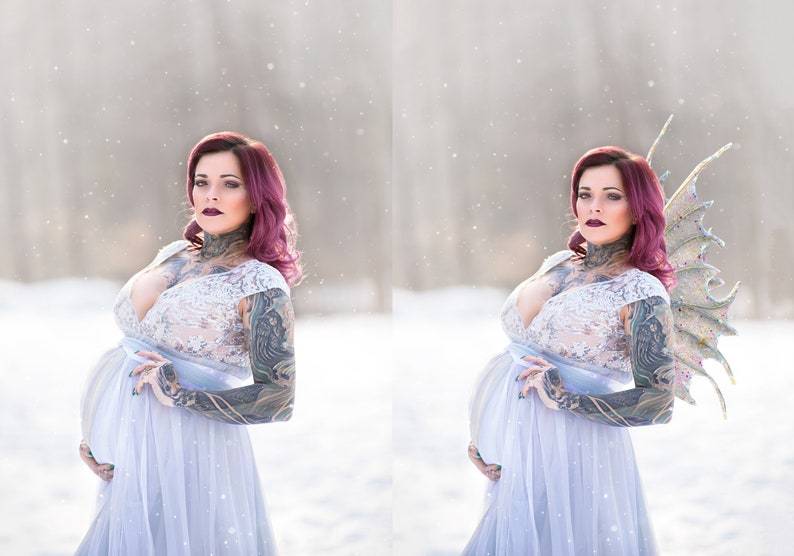
We’re all looking for a bit of magic to brighten up our daily lives, especially at times when things seem a little dark. If you’re struggling to think of ways to earn a living as a photographer right now, this tutorial will teach you how to upsell magic fairy sessions remotely for your clients using Photoshop. This enchanting technique will totally add another string to your bow!
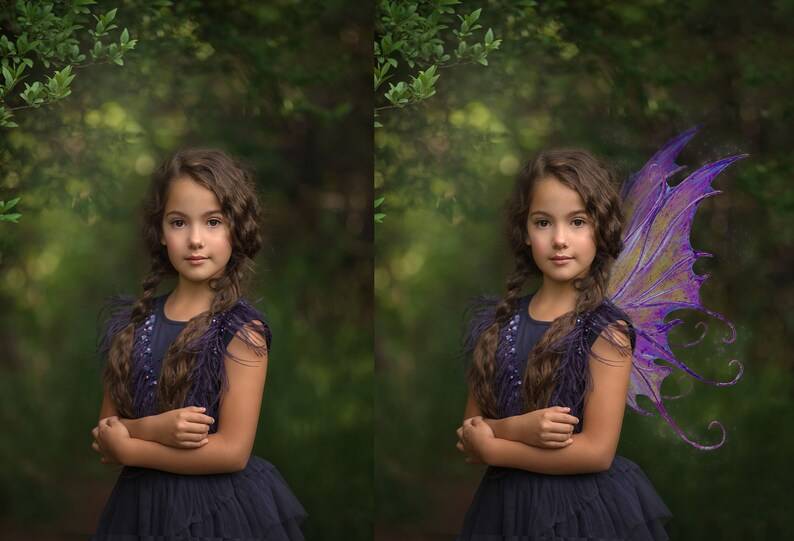
We’re going to teach you how to add fairy magic to your past sessions. This can be a great upsell for your existing clients to show them how you can improve their images and give the something totally different to the original, without having to meet up in person and do another shoot. You could also work on images taken during a remote video call session, which is a big new trend for sure right now!
Without further ado, let’s get stuck in to adding that fairy magic. You will need our Ever After Fairies or Wanderlust Fairies wing overlays collections to sprinkle that sparkle and glitter onto your images. For Summerana Academy members, we’ve also created a video tutorial that teaches how to add fairy wings to an image! You can follow along here: How to: Create Fairy Wing Composites
Now you just need to choose a portrait to fit the bill – let’s get started!

Choose your wings
The first thing you will notice is that we have a lot of fairy wings for you to choose from in our collection. You can get started by choosing which wings will be a great fit for your image! Think about how the colours and shapes will work together, how much space you have on the image, and what kind of feel the wings have to help you to decide.
If you aren’t sure how to get your wings unpacked and into Photoshop, don’t fear! We have another guide which will tell you exactly how to get started with that.
Prepare your image
The most exciting part of upselling remote magic fairy sessions is the ability to choose almost any image to complement the wings! You can start on an image that hasn’t been edited yet or even on one that you’ve worked on before. There’s no rules here – pop those wings on wherever you want!
If your image is a bit too small, what you can do is use the crop tool to open up the image a bit more. You can use the content aware fill tool to see if you can fill up that empty space that you have created (select it with the marquee tool first), or you can use the clone tool as well. Either way, this will give you a bigger canvas to work with! It doesn’t have to be totally perfect at first, because you’ll cover some of that background up with the wings. Later on, though, you’ll want to watch out for repeated patterns or areas that don’t seem to totally fit with the overall background, and just take those out with the spot healing brush or clone tool.
Drop in your wings
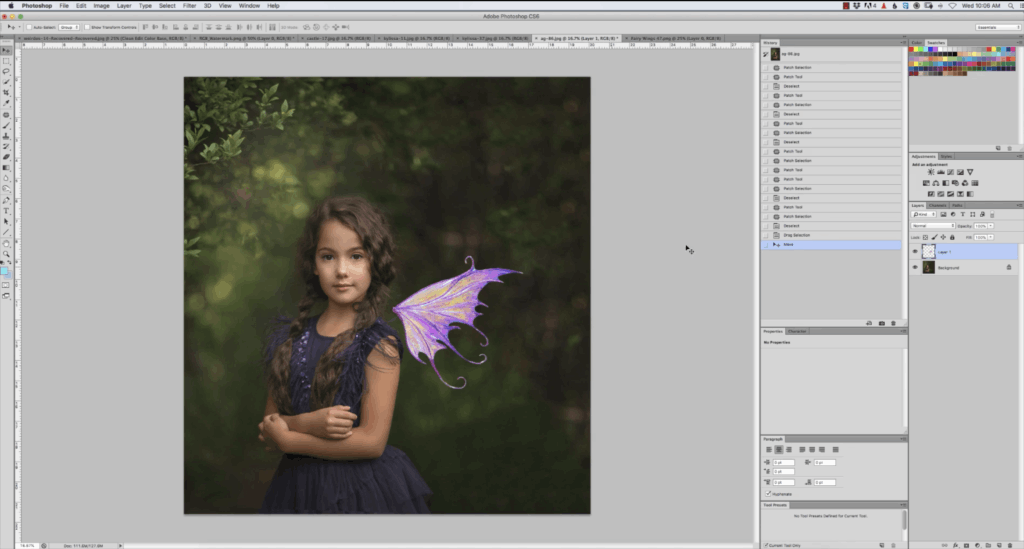
The next step is to put your wings into place. Go ahead and open up the wings in a new window (or use our compositing actions to add the wings, following the instructions there). If you want the whole of the wings, you can right click on the layer, select copy to, and add them to the image you are working on.
If you want just a portion of the wings, you can select the area you want – just the right wing, for example – with the marquee tool. Go ahead and hit copy (CTRL+C, or CMD+C) and then paste that wing down onto your image that you want them to appear on.
You’ll want to move them around until you get them to the right place, and then you can start working on them to make them perfect for your image.

Edit your wings
Are the wings not quite the right colour? Too bright or too dark? When you want to make some edits to them, you can do it right on the image instead of having to go back and forth to that source file.
Here’s what you do: select the wing layer and then find image > adjustment > hue and saturation in the menu. This will automatically select just the wing layer and you can move the slider around so that the wings are a different colour, brighter or darker, and so on.
It’s not just the hue and saturation tool this works with, either! You can use the brightness and contrast tool, curves, or levels to make those edits you want to make.
Now you can make the wings look more realistic in the image, and you can do this using edit > transform > distort in the menu once you have the wing layer selected. You’ll see a box around the wings with a few points around the sides. Click and drag any of those points to move the wings around, stretching and skewing them into perspective.
You can also drag the wings out to be larger or move them around using the normal selection tool. This will get them to the perfect position. Try to imagine where they would sit on the model’s back and attach them there!
Put the wings in the background
Now you have the perfect position and look for your wings, but there’s one problem: they’re probably sitting over the top of part of your model’s hair or body, right? So, we need to push them into the background.
Create a copy of your background layer (the original image you worked on). Drag it up above the wing layer so that you can only see your original image and not the wings. Now, add a masking layer to the copy of the background, and erase any part of the top layer that is in the way of seeing the wing. Go carefully around the model’s edges – you can use the quick selection tool to grab parts of your model, then invert the selection, and finally erase over your selection. This will only erase anything that is included in your selection – which means the model will be safe.

There you have it – a beautiful fairy wing photo! You can merge everything down and save it as a finished image to share with your happy clients.
Do you think you could upsell remote magic fairy sessions now? Tell us more in the comments! We can’t wait to see your enchanting images!