There are lots of ways you might want to make small adjustments to your subjects in order to make them look as good as possible. Clearing up spots, correcting patchy skin tones, and so on are pretty much par for the course. But there are some post-production techniques that you may not be well-versed in. For example, what do you do when your client has dark or light roots showing in their hair? Or what about just generally mismatched hair, or bad color casts?
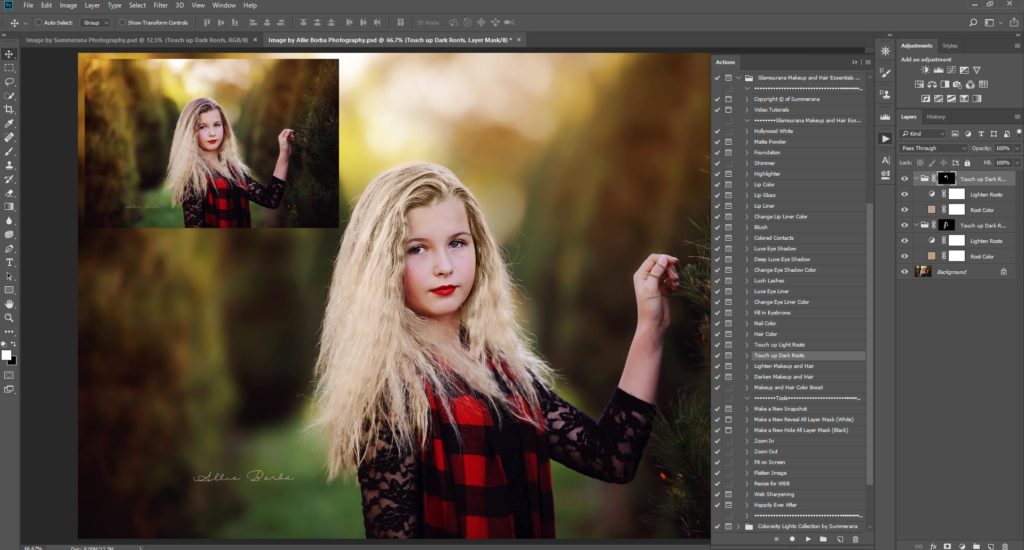
Well, you’re about to find out. Getting rid of roots in your client’s hair is spectacularly easy when you have the Glamourana Makeup and Hair Essentials Photoshop Actions Collection by Summerana. With this guide, we’ll show you how to get it done in just a few very easy steps.
Setting up your makeup and hair tool bag in Photoshop
To get started, make sure that you have installed the Glamourana Makeup and Hair Essentials Photoshop Actions Collection into your Photoshop. You’ll be able to find it in the actions panel when it is ready to use. If you can’t see it, just use the dropdown menu at the top of the panel to load in the actions, and select them from your folder where you downloaded them.
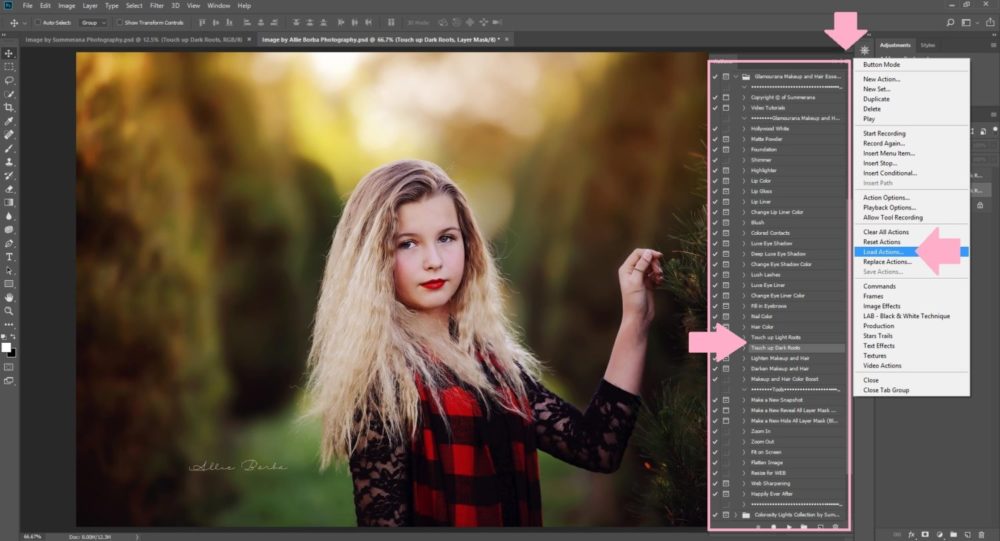
This will help you to get everything set up and ready to go. There are a lot of actions in the Glamourana collection, as this will help you to take care of everything from hair, to skin, to make-up, to eyes, and beyond. You can do everything and anything with regards to the face and hair once you have these actions installed!
Open your image that you want to edit and locate the ‘Touch up dark roots’ action in the actions panel. There’s also a ‘Touch up light roots’ action if you have the opposite problem! Press play, and you are ready for the magic to happen.
Getting started
There are on-screen tips that come up once you play your action, so make sure that you pay attention to those as they will always give you a reminder of what to do.
If you forget to read them, or you need a little more guidance, however, then here is how to get started. Take a look at your photograph and find the area where your client’s roots are showing through. It might be worth checking with them that they do want to have the roots removed, as they may have deliberately opted for this look for the images. On the other hand, it’s not always possible to schedule salon visits in time with a photoshoot, and so their roots may have grown out more than they intended.
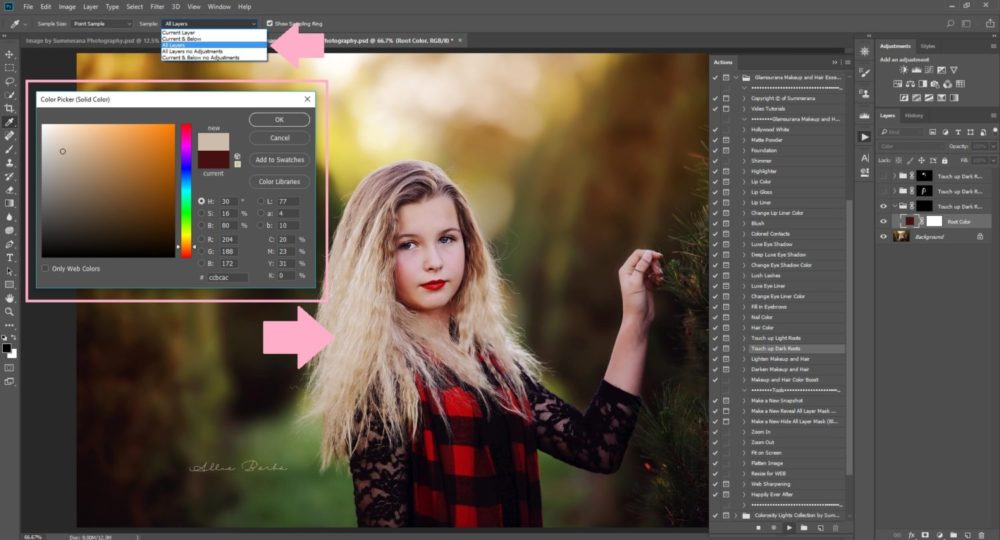
When the first pop-up instruction appears after playing your roots action, make sure that your eye-dropper is set to ‘sample all layers’. When your eye-dropper is selected, you will see this option at the top of your screen. If it is not already set up this way, you will want to click on ‘stop’ and change it. Then you can play the action again and get started properly.
Once your eye-dropper is ready, click ‘continue’. A second dialogue box will appear. This instructs you to select an area of hair near to where the roots are, in order to find a color closer to what you want. Don’t select something from far away, such as hair that hangs around the neck, as the tones may be very different to what you would realistically want. The effect could end up being jarring. When you choose something close to the roots, however, it will help your edits to blend in a lot better.
Editing your roots
Now that you’ve completed these first steps, you are ready to edit your image and get rid of those roots once and for all. In your layers panel you will see that some new layers have been created. These are labelled ‘touch up dark roots’ (or light), and then ‘root color’ and ‘lighten roots’ (or darken).
Using a soft white brush, paint onto the main ‘touch up dark roots’ layer where your roots are. You will instantly see a change, as the color shifts to what you want it to be. Try to paint only over the areas that you want to change.
If you have a color cast on your hair, you might actually be able to change this with the tool as well – you’ll see a difference when painting over all of the hair. Make sure that you consider carefully what you would like to achieve while editing the hair.
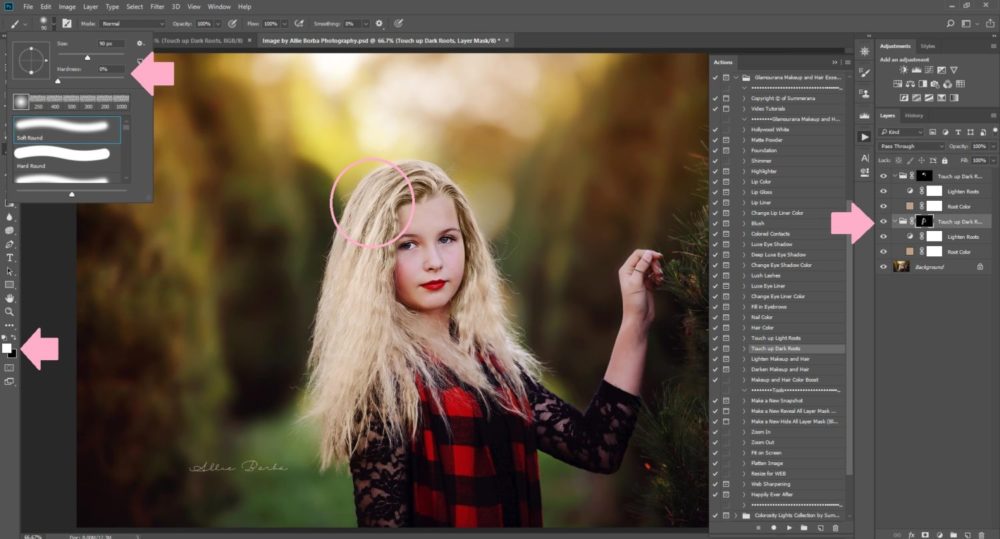
If you make any mistakes, you can use a black brush to paint everything back in to where it should be. You can also use lower opacity brushes to lessen the effect in one area if you want to keep it strong in others. A soft brush can help if you are having trouble with the hair seeming to have hard ‘edges’ of color change.
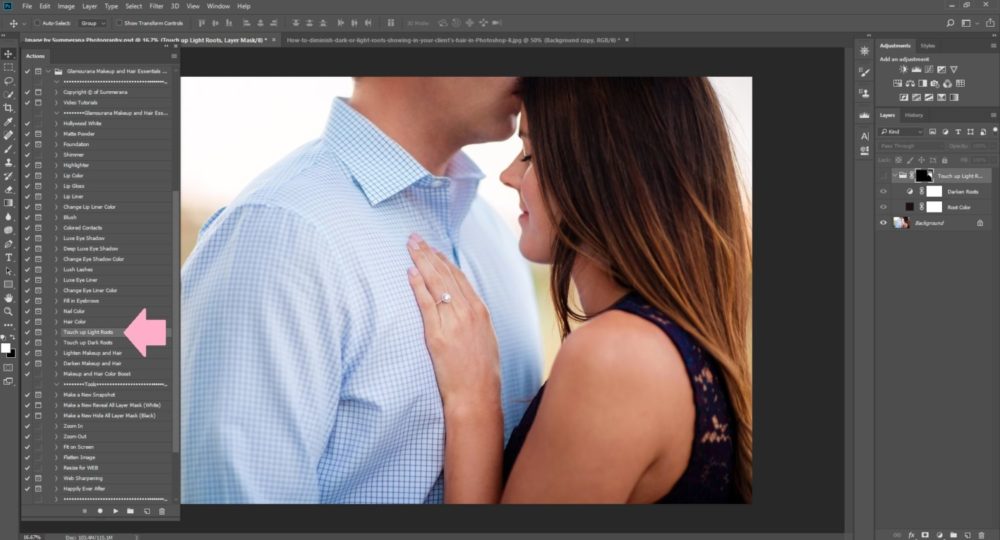
If you think that you have selected the wrong color and want to start again, you don’t need to throw all of your work away. Just double-click on the small square next to ‘root color’ which shows the color you are currently using. This will bring up your eye-dropper tool as well as the color editor, so you can select a new color. You will see instant changes every time you select a new color, so this can be a lot of fun! Additionally, you can play these actions multiple times to play with different colors and opacities to get perfectly matching hair.
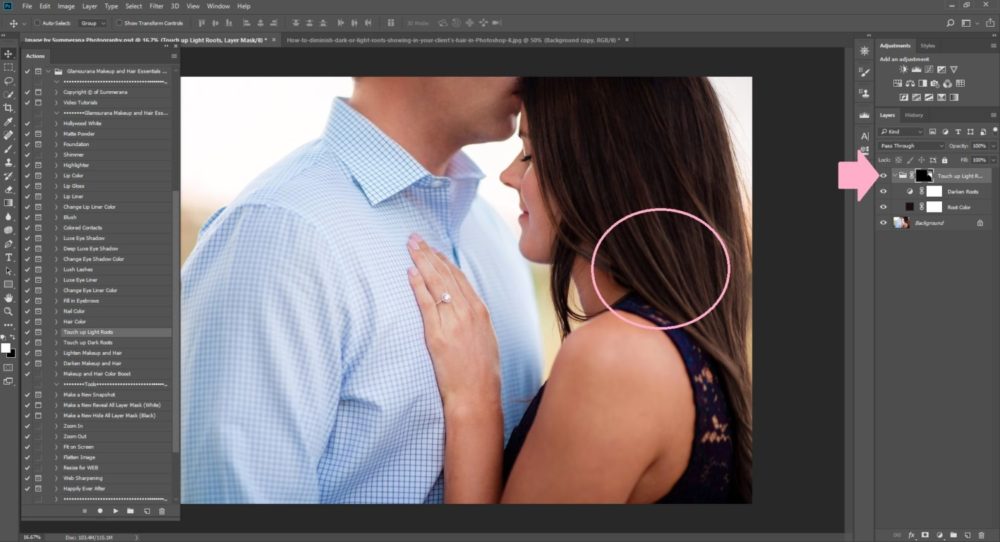
When you’re finished, you can save as a PSD or just merge and flatten all layers to create a file which can be saved in other image formats. That’s it – you’re done! It’s really easy to do this process and you can take care of all roots in a matter of seconds.
Before and after fixing dark roots:
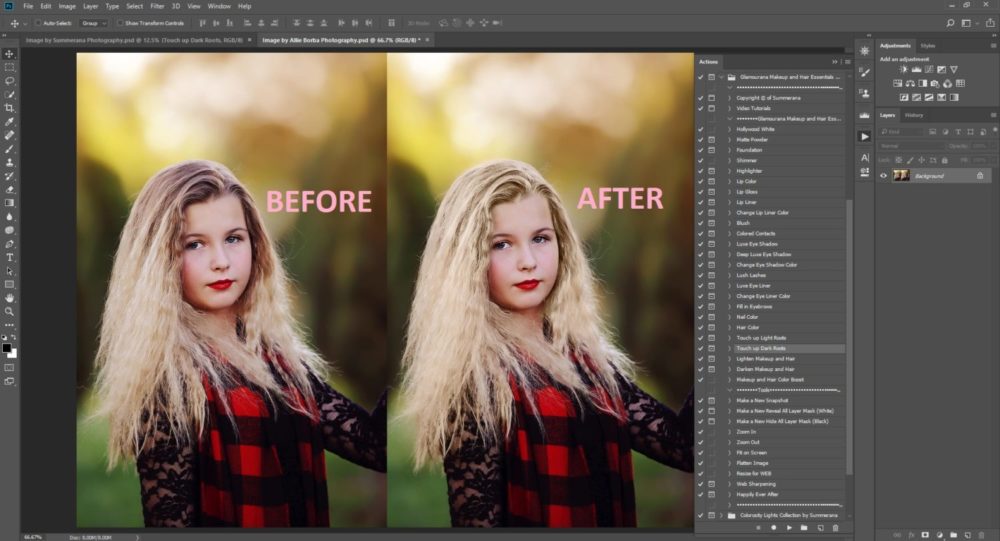
Before and after fixing light roots (image is not of roots, but just to show you an example):
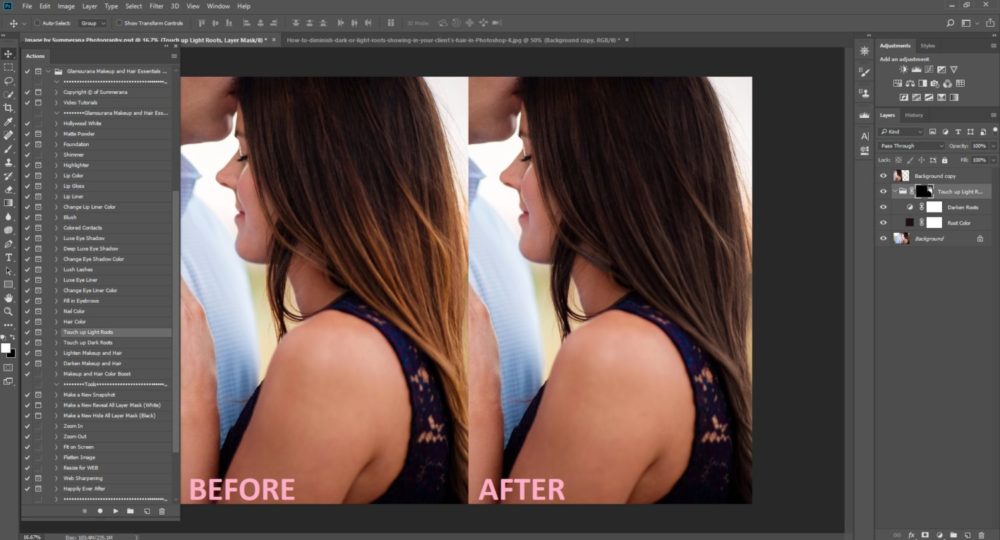
Here is a video by Grace Pamela showing how to fully edit the above images, going over the steps necessary for perfect hair:
If you want to see a run-through of this tool on other images as well as all of the other functions of the Glamourana Makeup and Hair Essentials Photoshop Actions Collection, then take a look at this video posted by Grace Pamela: