It’s Fall! For us photographers, this is one of the most anticipated times of the year where nature gives us a beautiful backdrop to help us create one of a kind, vibrant and colorful images. Whether you are a family photographer, wedding, landscape, etc… this edit will help you bring to life the beautiful colors you were able to capture sooc (straight out of camera) and get the most out of the images you create this season.
In this post I will walk you through on how to add more beautiful Fall colors to your images, and there is also a video tutorial where you can watch me edit from start to finish!
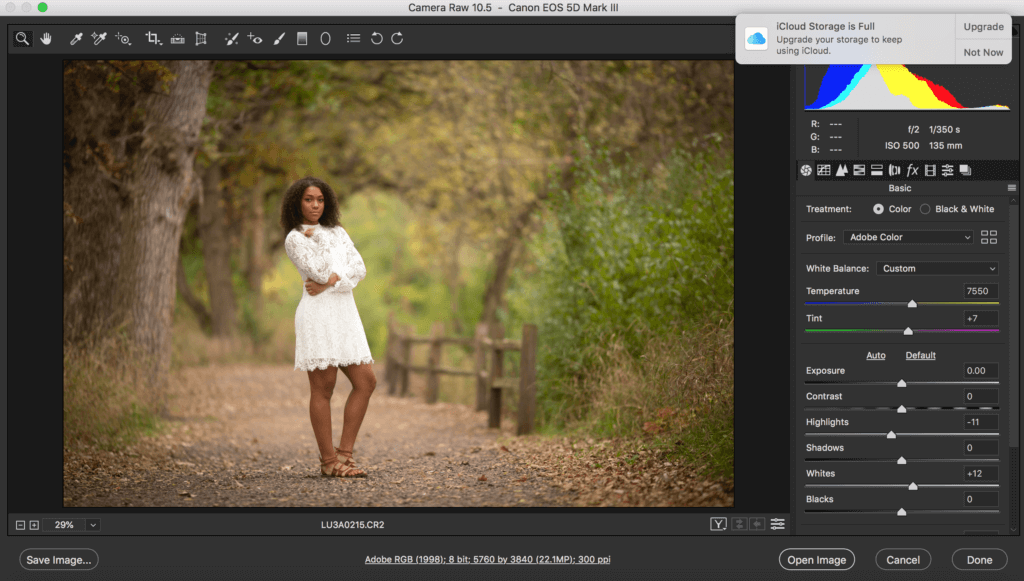
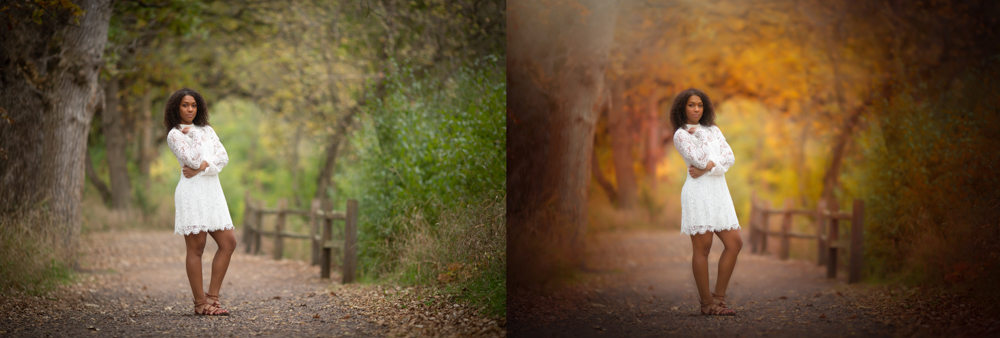
First lets go over how this image was shot. This RAW image was taken with a Canon Mark III and the Canon 135 mm 2.0 Lens. It was taken at 2.0 Aperture under overcast weather using Manual White Balance (Kelvin) at 6500 WB. As you can see, we have a wonderful image to begin with so we don’t have to make many initial corrections.
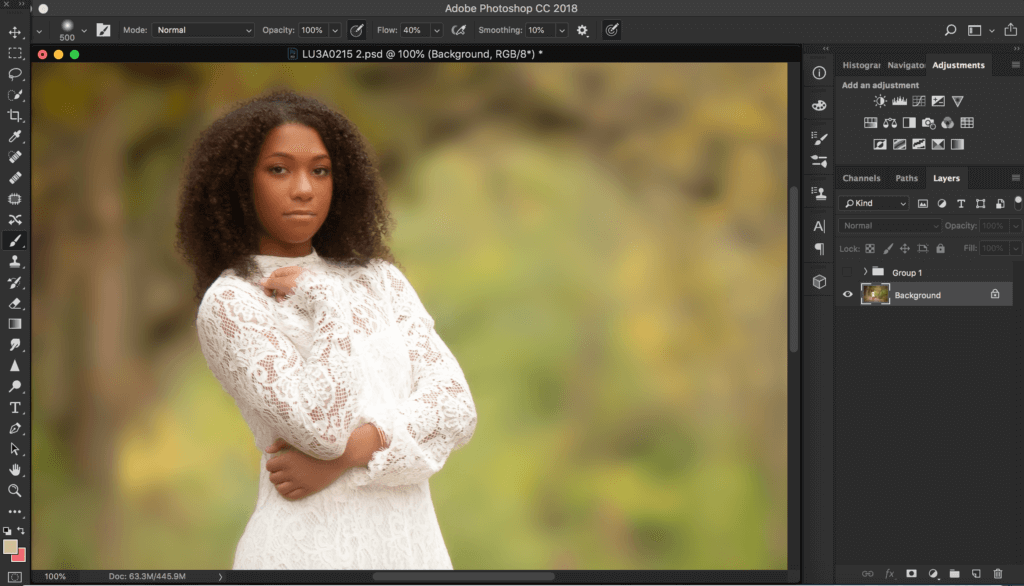
After my initial adjustments were made in the Camera Raw window in Photoshop, I first look over the image for any distractions. This not only includes any major blemishes on my model but also any weird leaf patterns in my image that would distract your eye away from the subject. Afterwards, I will run the image through Portraiture, which helps my subjects skin and also gives the image as a whole, a smooth and buttery finish. I will also edit and dodge and burn my subjects skin using Summerana’s Everyday Essentials Photoshop actions. Lastly, I will add a blur to the background by making a merge visible layer and running it through a Gaussian blur filter and masking the effect off of my subject. Note: When using Gaussian blur to blur your background, make sure you blur just slightly and carefully mask off of your subject and the focal plane they are standing on including the ground. That way, your blur will look the most believable.
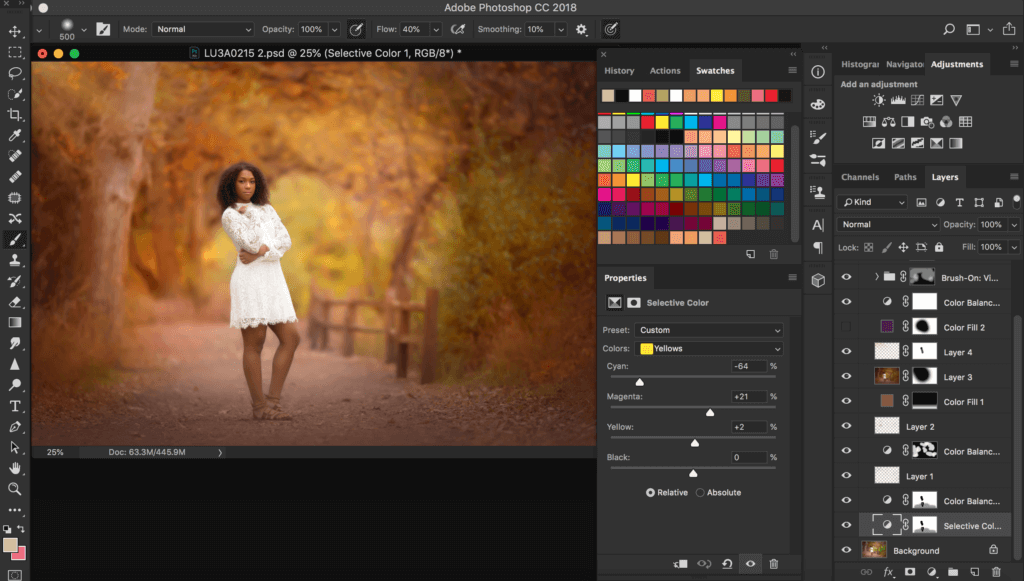
Now it’s time for some Fall editing fun! I achieve beautiful red, orange and yellow tones by using the selective color adjustment layer. Once you have it pulled up, you will go though your green, red and yellow panels and bring your cyans down all the way to the left and bring your magenta’s up a tad as well. Afterwards, mask off of your subject and any other areas you feel looks good. I will also use a color balance adjustment layer and pull up the reds and mask off accordingly as well. Lastly, I will create a separate blank layer and paint on at 10% opacity, the colors already found in my background. You can get these colors by holding down the “alt” key and selecting colors from your background using the eyedropper tool.
For some last minute toning and touch ups, I will use Summerana’s light Photoshop action, haze (WHICH I LOVE) and Summernana’s ColorFall Photoshop Actions and ColorFall Flare to make the image pop! That’s it! Thank you so much for going through this tutorial with me. I hope you found it to be helpful and I would love to see what you come up with yourself! <3
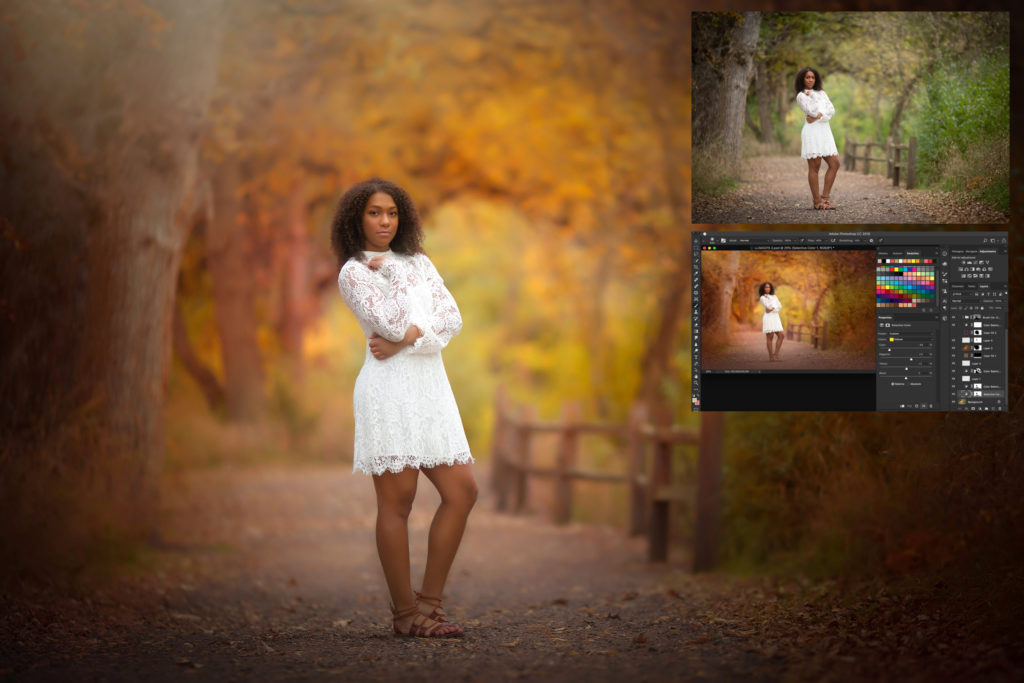
BEFORE & AFTER:
Here is the video editing tutorial on how to create Fall colors in Photoshop:
We hope you enjoyed this tutorial!
You can see more plus get Fall Photoshop actions, leaf overlays, Fall marketing templates, and full editing workshops in the Summerana Membership here.

Thank you
Wow! A unique variety of colors and hues nature! The given steps of free fall colors in Photoshop will help everyone to emphasize the beauty of the landscapes or nature backgrounds on their photos.