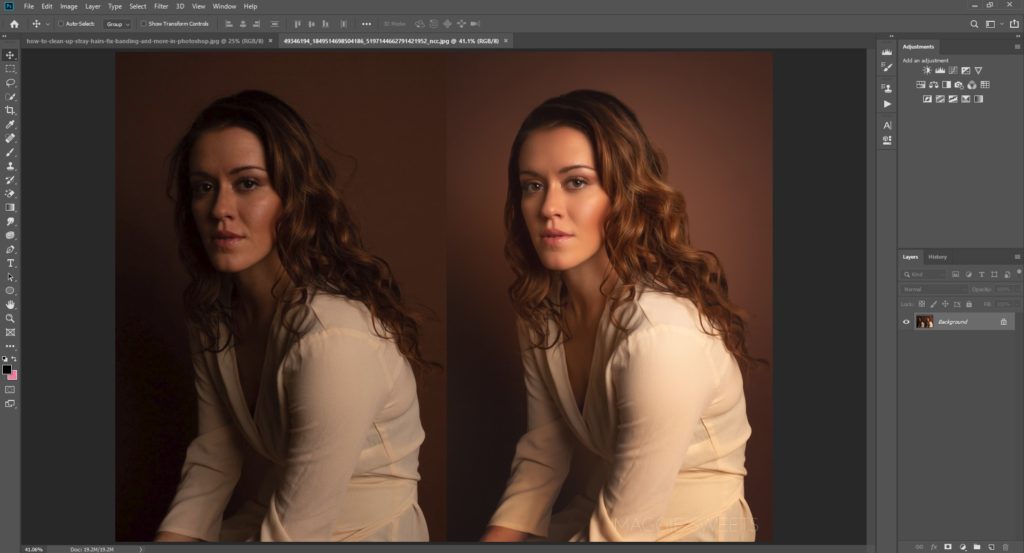
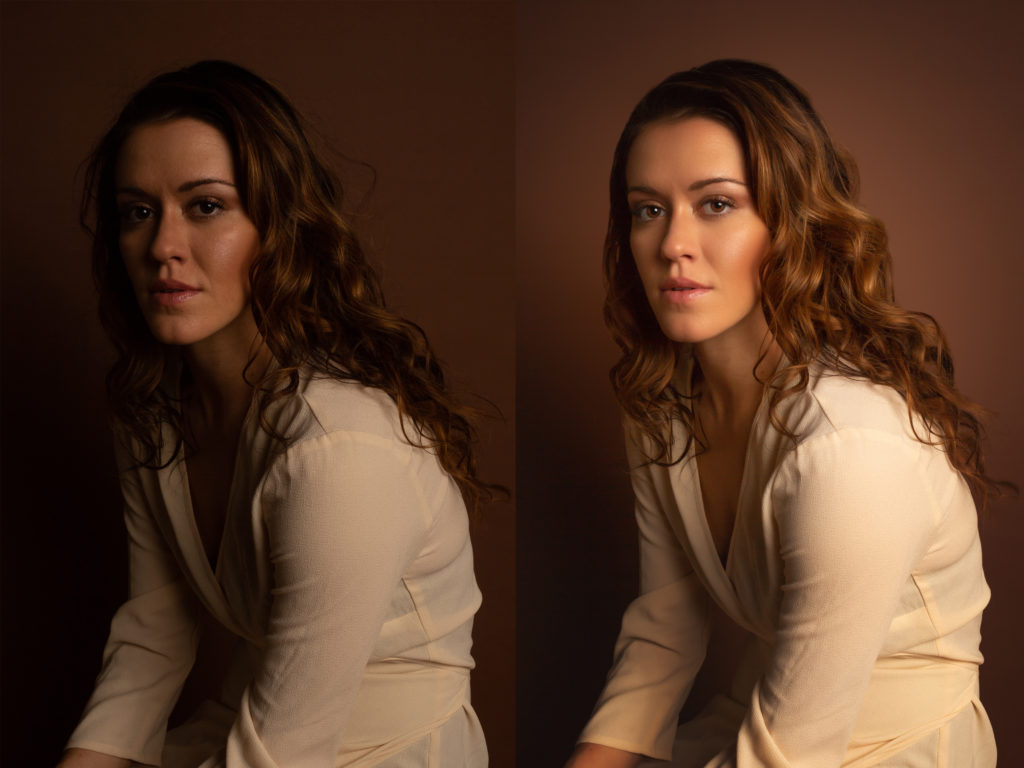
“Ain’t nobody got time for this!” This may be what’s running through your head when you photograph a gorgeous portrait of your subject only to find out you have to edit out hair that is blowing in the wind a little too much or flyaways that seem to play peek-a-boo a little to well. Well don’t worry! Today, I’m going to show you my FAVORITE way of taking care of those pesky little stray hairs plus edit a portrait headshot from start to finish.

Editing stray hairs and flyaways is one of the best ways to clean up your image and create a polished and professional portrait. If you are photographing people, being able to do this well is a must! In addition, we want to give our clients the very best images and this basic skill is necessary in order to do so.
The image I will be working with today is a studio portrait of Maddie or Madeleine Scott, a professional ballerina (Instagram: @madsavscott). Maddie had just finished dancing in the studio when I asked her to sit down for a headshot. When I went to go and edit this portrait, I noticed there were some stray hairs that I had forgotten to check for before photographing her headshot and I had to clean up in post processing.

As I open up the image in the Camera Raw Filter, I first noticed the image was underexposed so I increased the exposure, increased shadows and added luminance and color noise reduction. When I open it up, I notice very small stray hairs that I can easily take care of using the portraiture plugin. Portraiture is great for many reasons including diminishing small stray hairs. For the other flyaways, I will use a different method. After playing the Portraiture plugin, I will flatten all of my layers and duplicate a layer once again. From here, I will use the clone stamp tool and while holding down the “alt” key, select areas of the background very close to the stray hairs and stamp them on top of the hairs. Once I have all of my stray hairs covered, I will place a mask on the stamped layer and invert the mask. That way, I paint on the effect only where the stray hairs are. When I am painting the effect on, I will be using a white brush as my mask is black. I will also have the hardness set higher as I don’t want a feathered edge to my subject’s hair. That’s that! It may take some practice but out of all of the methods I have seen and used, this is my favorite and fastest way of taking care of those pesky little hairs.
After this, I will retouch the image a little bit more including using the clone stamp tool to take care of banding on my seamless paper backdrop. Afterwards I will start retouching Maddie’s skin and eyes using the Summerana Everyday Workflow Essentials Photoshop Action Collection including “diminish flaws” which is a frequency separation action and also “whiten eyes”. I will also add additional eye and skin highlights as well as a dark vignette using curves!
Here is a video tutorial so you can watch me edit this image from start to finish!
I hope you enjoyed this tutorial and found it helpful!
For more helpful tutorials and videos, make sure to subscribe to the Summerana Membership which is filled with hours of editing tutorials complete with actions, overlays and even marketing materials!
Hey Maggie Sweets, Thanks for sharing this nice tutorial. You are focusing a part of photoshop. Yes, hair masking creative work. Again thanks for teaching me about this. keep continuing.
All the best.
So glad you enjoyed it! <3
What did they ever do without photoshop all those years ago. Great tutorial!
So true! It’s such a great tool.