
You’ve seen bokeh before, right? It’s the beautiful light effect that you have admired in countless photographs, where all the sparkles and lights of the background are turned into circular coloured spots. A skilled photographer can get it to appear in the foreground, too. Let’s take a look at how you can maximize the amount of bokeh in your photographs and get an effect your clients will love both in and out of camera.
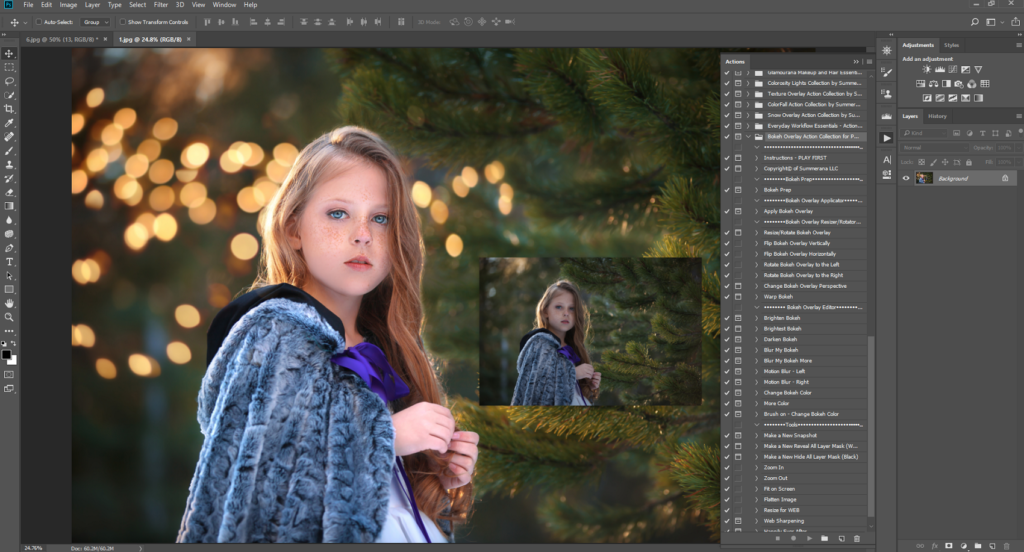
Image is courtesy of Shannon Squires Photography
Edited using the December Lights – Bokeh Overlay & Photoshop Action Collection
The Science
Where does bokeh actually come from? Well, you cannot get bokeh in sharp focus – the look is created when you have something lit up or light in the background which has gone out of focus. This soft focus allows the bokeh to appear – when you think about it, it’s actually a fault of the camera lens. But it does look amazing, so instead of stamping it out, you as a photographer may try to encourage it to happen.
You may see some bokeh which is perfectly round, while others seem almost to have a collection of straight lines arranged in a circle. There’s a reason for this – it’s all down to the shape of your lens, which will impact the shape of the bokeh. If your lens has circular shaped blades coming together to create your aperture, then you will see a more circular bokeh. If you have a hexagonal aperture, then the shapes of your highlights will take on this form as well. You can plan out how your bokeh will look initially by making sure that you pick the right lens.
There is no right or wrong choice here – just pick the shape which looks best to you and appeals most to your tastes.
The Lens
Other than just the shape, there are more factors to consider when choosing your lens. Not just any old lens will do – it needs to be a fast one, and the faster the better. What do we mean when we say fast? Essentially, you need to get a lens which can go down to at least an aperture of f/2.8. f/1.4 or f/1.2 is going to be the ideal solution if you want to get the optimum bokeh. Prime lenses are very popular choices for photographers for this very reason. Of course, these lenses also tend to be pricier, so it’s down to what you are able to lay your hands on.
A great starter lens for this would be the 50mm f/1.4, which won’t break the bank. Other great lenses are the 85mm f/1.4, the 70-200mm f/2.8, the 105mm f/1.4, Sigma art 50mm f/1.4, and 200mm f/2.
If you cannot shoot in manual mode, you will want to have your camera set to aperture priority mode and make sure that your automatic focus can pick up the object that you want in your foreground. If it can’t for some reason, this would be a good time to learn how to use your manual focusing mode. There are many reasons why you should learn how to shoot in manual mode (read more on that here) and this is one of them. If you do not get that background in soft focus, it just won’t work.
By the way, if you can’t get your hands on a fast lens, you can still try this out. Instead of going for the lower range apertures, you can even get bokeh at something like f/8. All you have to do is to increase the distance between your subject and the background. This is a great tip whether you are shooting fast or not, because the greater that distance is, the more your bokeh will stand out.
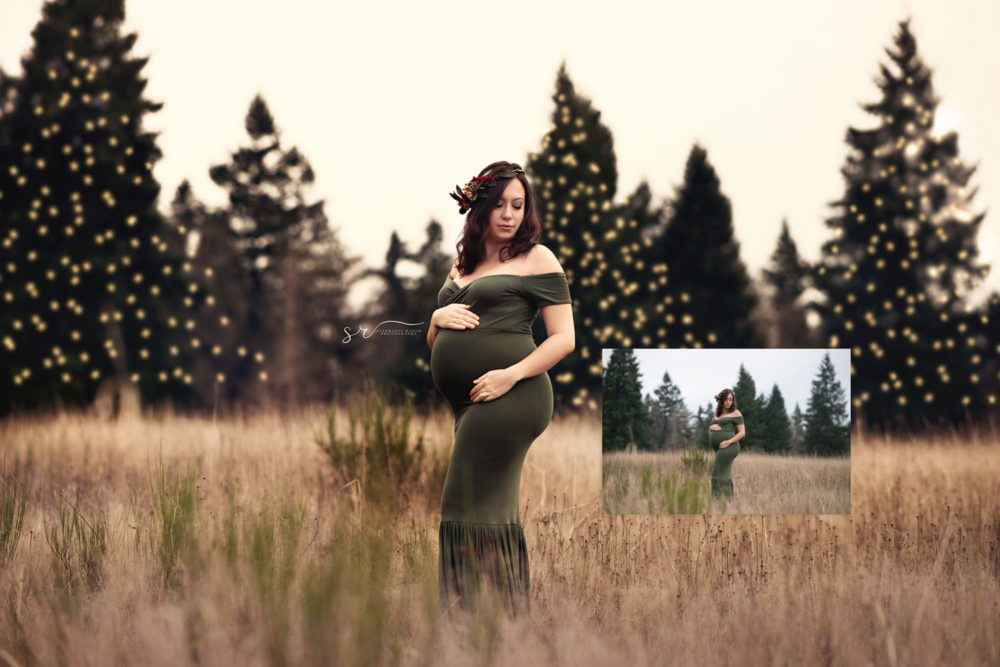
Image is courtesy of Stephanie Ratto Photography
Edited using the Winter Lights Bokeh Overlay and Photoshop Action Collection
The Lights
You really want something in the background to have light bouncing off it, as this will make the bokeh stand out more and be more pleasing to the eye. If you are shooting outside, you may not be able to control this – however, you can always keep lights on buildings or as decorations in the back of your frame. Consider shooting, for example, out near some Christmas decorations. You can light your model up and have the far-away lights provide the bokeh on their own.
Otherwise, you can use a variety of lighting techniques to get that bokeh looking great. You could consider using a backlight or sidelight, for example. Even a hair light will create the desired effect – all while potentially making your portrait look all the better, too.
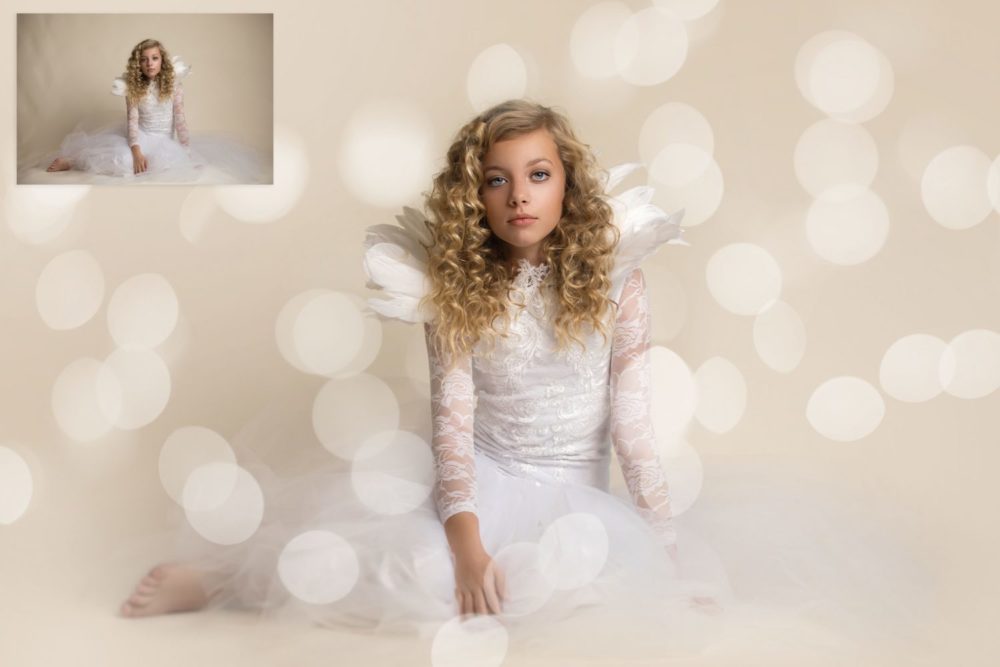
Image is courtesy of Shannon Squires Photography
Edited using the December Lights – Bokeh Overlay & Photoshop Action Collection
The Subject
As we have alluded already, a portrait really makes for a great use of bokeh. You can get your model to move around until you have them in the best place to create that look, which is convenient and makes your job a lot easier. You can also really bring character or romance to a portrait with bokeh. You can put a twinkle in the eye of your model and have it match up with those twinkling lights behind them. It’s a really great effect that most clients will love.
There are other subjects that you can use for a great bokeh image too. Macro images of flowers or even insects – like butterflies – can look very interesting and bring another edge to what might otherwise be a flat image. You could even try something like taking a photograph of a single holiday light or decoration, using the rest of the lights to create your bokeh. This can create a beautiful image that could accompany all of your holiday marketing to instill a bit of the holiday spirit.
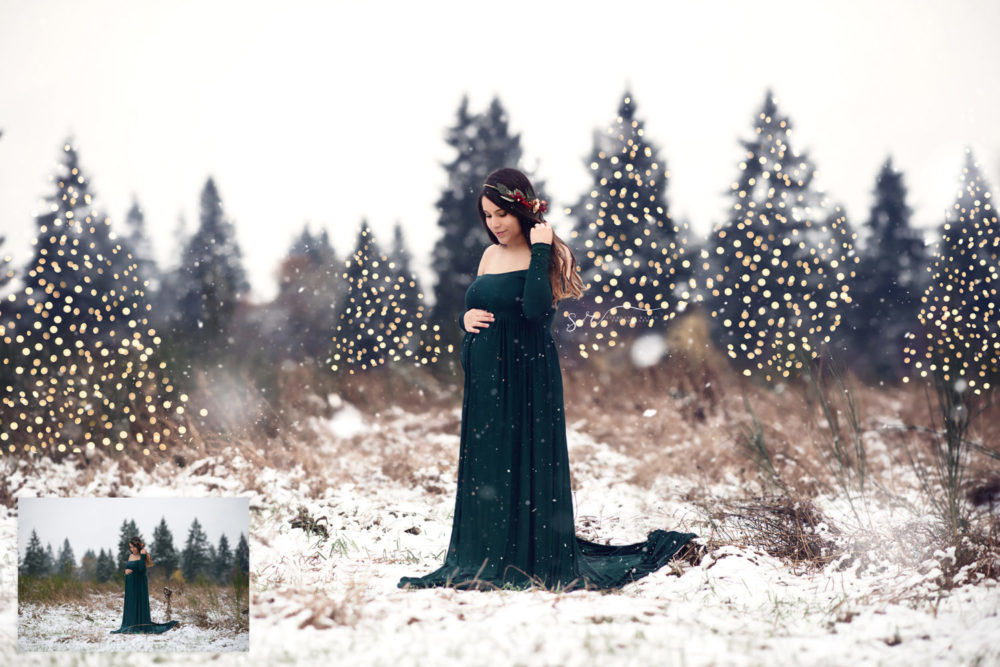
Image is courtesy of Stephanie Ratto Photography
Edited using the Winter Lights Bokeh Overlay and Photoshop Action Collection
The Cheat
Of course, shooting for bokeh is brilliant if you have the right lens and the right setting. But as we already mentioned, this can be particularly difficult when shooting on location. It’s also very hard to do when you only have a small studio space to work in. So what can you do then?
Cheat, of course! You can use Photoshop actions, overlays, and brushes found in the Creating Light in Photoshop section of our Membership Library. (Celestial Bokeh Brush and Action Collection, Winter Lights – Bokeh Overlay and Action Collection, and December Lights – Overlay and Action Collection are all collections made for creating beautiful bokeh in the library). There are so many awesome tools to use! Using these tools, you can enhance the bokeh you’ve captured in camera as well as add bokeh to an image where there previously was none. However, be careful! You need to make sure that it looks realistic, so you need to place it in the right areas. This should be easy enough to do if you know how bokeh works. Find lighter areas of the background to use as a setting for your lights. You could place them on top of buildings or even background trees. This gives the impression that the background is full of those twinkling lights, and can really liven up an image.
It’s particularly perfect for seasonal looks, as bokeh brings to mind the idea of magic and decorative lights. It works all the better on a darker background, too, so a night time shoot can really benefit from some added bokeh. Keep that in mind when you shoot, so that even if you cannot create your own bokeh, you can leave a little room for it to peek through.
Watch them in action here:
What’s your favorite image that you have taken with bokeh? How about any that you have added bokeh to in post-production? It’s always great to see what you can create, so follow our tips and let us know what you can come up with.
Great article. I shoot at 200mm at 2.8 even for portraits to get the maximum Bokeh. I love surprising subjects by putting them in front of the most un-obvious background like a road sign and making it look great in camera.
Great article. I shoot at 200mm at 2.8 even for portraits to get the maximum Bokeh. I love surprising subjects by putting them in front of the most un-obvious background like a road sign and making it look great in camera.
Pingback: 10 Interesting How-To Photography Guides Online - Photo Contest Insider
Pingback: 10 Interesting How-To Photography Guides Online - Photo Contest Insider